Creating a backup of the WordPress website is the most important thing that you need to ensure is handled properly. However, knowing how to restore the website from a backup is very important. At any given time your website’s software may collapse and you will lose all of your data.
Most websites big or small will lose their data at some point. However, using backup they can restore their data and website to their original state. WordPress as the most popular content management system in the world, has considered this issue and provides its users with the ability to backup and restore their websites.
In fact, on a WordPress website, we generally have options for getting a backup. One of them is through the WordPress admin dashboard. The other way is to get backup from our cPanel, which has a few different types of backup, one of which is a full backup.
You can also make use of WordPress backup plugins that are particularly useful for creating backups, as well as restoring or migrating websites between WordPress hosting accounts.
Our goal in this article is to teach you how to restore WordPress backup.
How to Restore WordPress Backup with Plugin?
There are WordPress plugins that let you restore backup easily and quickly.
WordPress Importer
If you have used WordPress’s built-in method to get backup, You can now go to the plugin store of WordPress and download a plugin to restore your WordPress by using the backup you got.
After installing the plugin you will be directed to a page where you have to upload the XML file (backup) you’ve downloaded before.
WordPress backup contains your WordPress database along with URLs for your images, user’s information and etc. So, if you want the content of your previous website to be transferred to the new website exactly like before, then you will have to make sure the folder wp-admin/uploads are in your backup file. Because when you upload a backup, you will be presented with a checkbox. If you tick it, all of your previous media from backup file will be uploaded to your website.
Keep in mind, this backup doesn’t include WordPress itself. Before using this backup on your new website, you will have to install WordPress and configure it.
Also, if your XML file (backup) exceeds your max upload file size, you won’t be able to upload it on your website. In this case, you can make some changes to your php.ini and .htaccess files or contact your hosting provider and ask them to increase the upload limit of your website.
ManageWP Plugin


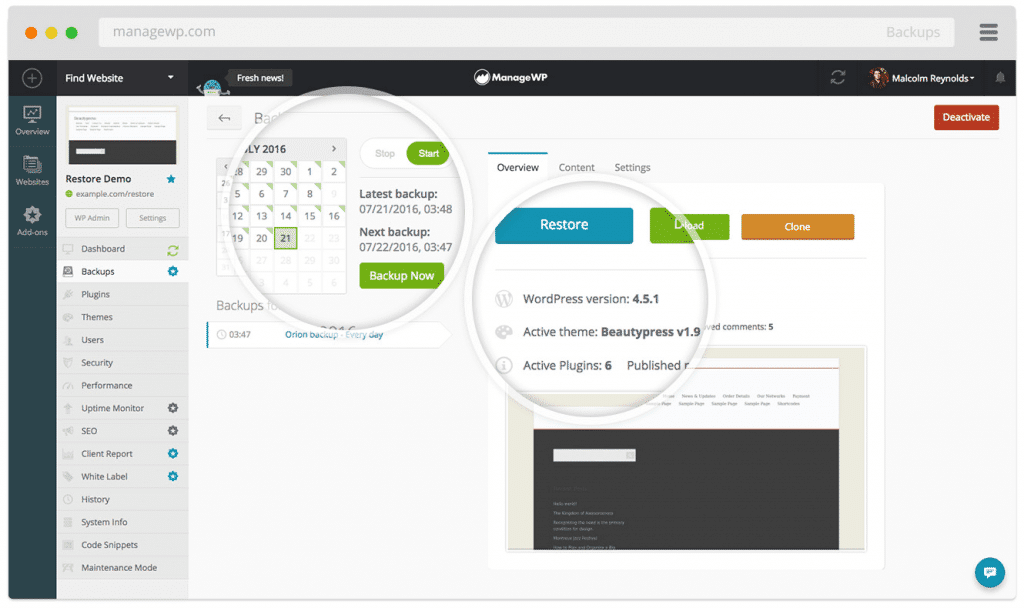
ManageWP is one of the complete and popular plugins designed and produced by GoDaddy. When you install this plugin on your WordPress website, you are connected to managewp.com and you get your personal panel which gives you access to its many features.
ManageWP offers both premium and free features to its users. In the free version, your website will get a cloud backup every month, if you wish it to happen sooner you will have to pay $1 to upgrade your account to premium.
To restore a backup you will simply have to go to your panel given to you by ManageWP, click on view backups for the website you wish to use. Then, select your desired backup and click on restore. A message will be displayed to you “website restores successfully” once that shows up your website has been restored to the backup file you selected.
How to Restore WordPress Backup with phpMyAdmin?
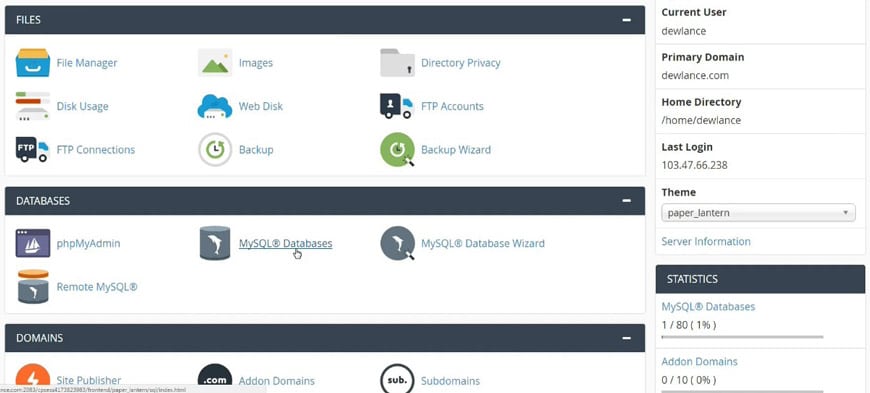
If you have used phpMyAdmin to get backup for your website and also you have your database backup, or the backup you received was only for the database (a file with .sql extension). First, you need to enter your cPanel and go to phpMyAdmin and restore your website there.
If the backup file you have is for your database, when you open phpMyAdmin on the top menu, find import and upload your file there. This will restore your database.
But if your backup is for a specific table in your database and you wish to restore that specific table then you will have to find that table on the left menu. And then delete any information it may have and click import and upload the specific backup you have for that table.
How to Restore WordPress Backup through cPanel?


You can restore your WordPress through cPanel. This method is recommended for backups with MySQL or Home Directory.
To restore these backups, enter cPanel and head over to Backup. In this section, you can upload either your MySQL or Home Directory backup to restore your website.
Keep in mind, this method is only recommended and useful for the said backup types. If you have Full Backup you cannot restore your website through cPanel. The only way to do so is either by WHM which is usually accessible for private servers owners and your hosting administrator.
How to Restore WordPress backup with FTP?
Another way to restore your WordPress is to manually upload your files. If you wish to upload/restore your Home Directory or Public_html files you will have to use FTP.
To transfer your files using FTP you will need to connect to your server using third-party software such as FileZilla. Then you will have to create an account for your FTP or ask your hosting provider to give you an account.
After getting the required information to connect to FTP, put your username and password along with your domain name in FileZilla. Once you are connected you can see your Home Directory. Then you will be able to “drag & drop” your files into your server.
Conclusion
The process of getting and restoring a backup in WordPress is simple, however, it may take some time and patient. In this article, we discussed different ways of getting backup and restoring your WordPress website. WordPress built-in backup method with XML extension which only contains your WordPress information. Home Directory and database (MySQL) backup. Keep in mind, if you want to transfer your website all at once, these methods are not enough.
Because Home Directory backup does not include your database information and you will need to restore your database too. If you wish to restore everything and transfer your website all at once, it’s best to use Full Backup and then hand it to your host provider to upload.


