Putting a password on your WordPress page helps you have specific users visit your WordPress website.
You may have an online store with WooCommerce. In this case, you need to password protect your WordPress. The type of your website and the activity you have on your website affect how you would protect your site.
You can password protect your entire WordPress website or parts of your website. You can put a password on your categories, posts, and even WooCommerce products.
Putting a password on a WordPress page is very simple. Follow the steps below and use one of the best WordPress password protect plugins. By the end of this article, we will also introduce a few security plugins to protect your site.
If you want to know more about customizing your WordPress login screen, how to tweak it, and how to select the right plugin for your needs, you’ll want to read this article.
Why Do You Need Password Protect in WordPress?
Suppose you have launched an educational website. On this website, you have a few courses to purchase and you only want users who buy them to have access to them.
You can do so by putting a password on your WordPress page. You can even display your content to a specific group of users.
What we mentioned above is only one reason to password protect your WordPress website.
How to Password Protect in WordPress?
In this article, we tend to teach you how to add a password to your WordPress website, parts of your content, categories, and WooCommerce products.
How to Password Protect Whole WordPress Site?
When you are working on your website and your content is not finished yet, you may want to give access to a handful of people.
If that is the case, we recommend using Password Protected plugin to put a password on your entire website.
After installing this plugin, whoever visits your website needs to enter a password, otherwise, they won’t be able to see your content. They don’t need to sign up as a user on your website, they just need to type in the password and click enter.
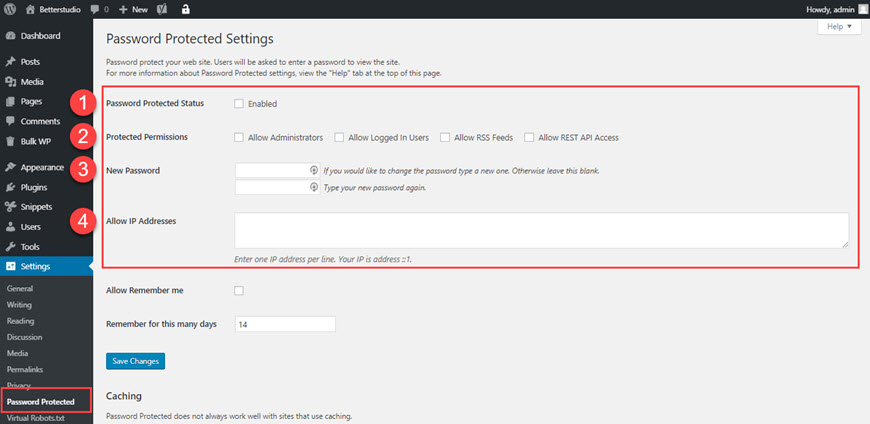

After installing and activating the plugin, from your Settings click on Password-Protected. In the Password Protected Setting, check Password Protected Status. In addition, make sure you check Allow Administrators and Allow Logged in Users.
You can also IP restrict your website visitors. To do so, type in different IP addresses on separate lines.
Once you have typed in your password in the New Password section, make sure you click on Save Changes.
Coming Soon Page & Maintenance Mode Plugin
You also can display Coming Soon or Website is under maintenance message to your visitors by downloading the Coming Soon Page & Maintenance Mode plugin.
After installing and activating the plugin, from Settings click on Coming Soon Page & Maintenance Mode.
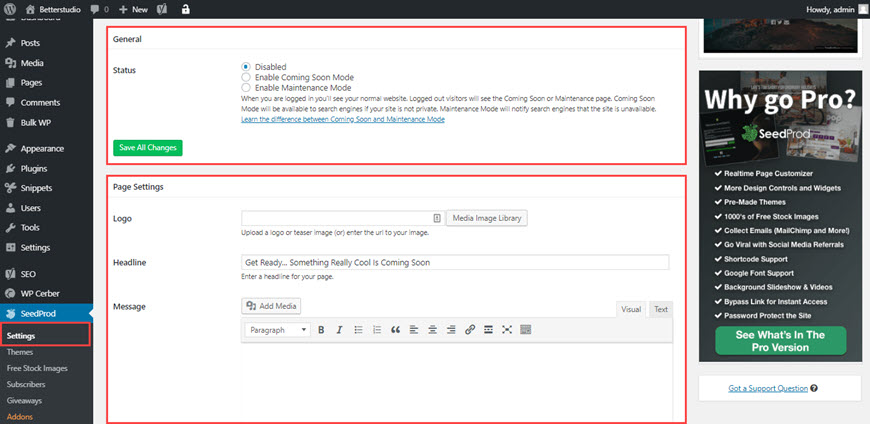

In the Settings, you can choose a logo, header, and your message. You can also choose a favicon.
Also, you can also add SEO keywords, meta description, and Google Analytics code.
If you set your Settings for Coming Soon, Google will index your header and your page. Although, if you choose Maintenance mode, Google won’t index your page.
Password Protect WordPress Site without Plugin?
From your cPanel, look for the Security section. Click on Password Protect Directories. In the opened list, choose your website.
In the opened window, choose a password in the Security Setting. Also, check ‘Password protect this directory’ and click on Save.
In the Create User section, enter your username and password. Then click on ‘Add or Modify The Authorized User’.
By following the steps above, a window appears to enter your login credentials.
How to Password Protect WordPress Categories?
Putting a password on your category is another method to restrict parts of your website. By doing so, only specific users can access your categories.
To do so, you need to download the Access Category Password plugin.
After installing and activating the plugin, from your Settings click on Access Category Password.
In the password section, type in your desired password.
In the Impacted Categories, choose your categories. By doing so, you can select which categories you want to password-protect.
In the Granting Users, selected users can access your categories without entering any passwords.
It’s best to disable the ‘Only Hide the contents of the single post’ option. By enabling this option, archived and live posts will be displayed on your website.
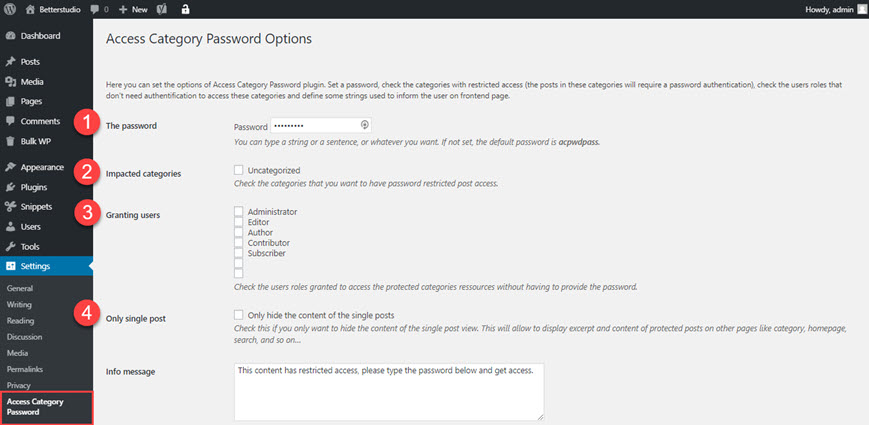

Finally, choose a message to display to your users in the “Info message” box.
How to Password Protect WooCommerce Products?
Unlike previous steps, you don’t need to install any plugins. You will use WooCommerce features to password protect your products.
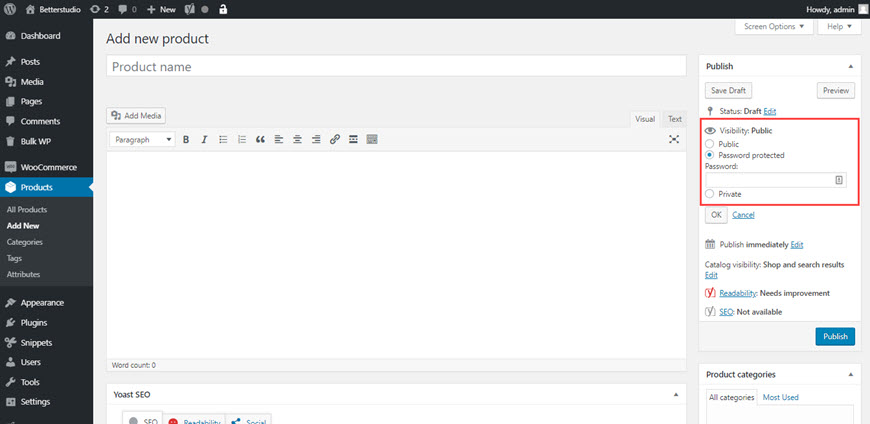
To do so, go to WooCommerce product editor. Scroll down until you see the eye icon (visibility status) and click on Edit. Then choose Password Protected. In the password box, choose your password and click on OK.
After publishing or updating your content, the password will appear on the product.

To bring a good user-experience it’s best to use the same password you used for the methods above. By doing so, your users can access your password-protected content with one general password.
How to Password WordPress Content? (Password Protect Text)
To password protect parts of your website, you can use the Passster plugin.
By installing this plugin, a new icon appears in your text editor.
Select parts of the text you wish to password protect. Then click on the new icon called Add Content Protector shortcode.
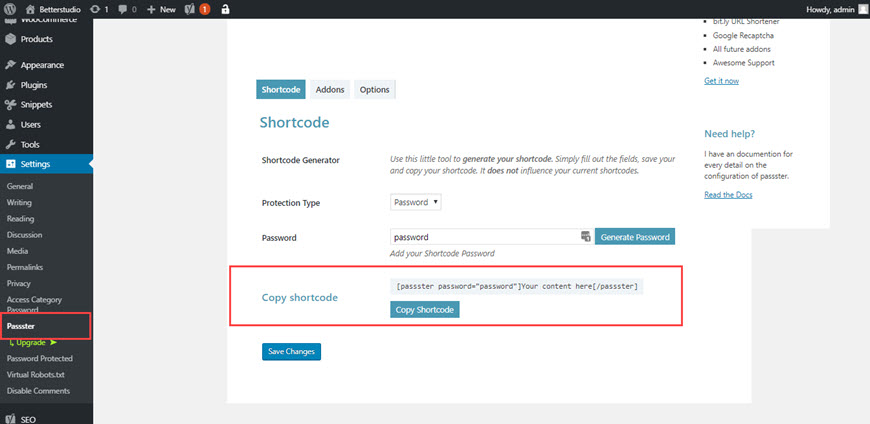

Enter your password and click on Insert. Now you have password-protected WordPress content.
How to Password Protect Directory in WordPress with .htaccess?
Below we discuss how to password protect your folders with .htaccess. This method works without causing the 404 not found error.
To do so, create a 401.html file.
Copy and paste the text below to the created file:
AUTHENTICATION REQUIRED
 You need a username and password to access this area.


Save the file and upload to your root directory.
By doing so, you prevent 404 not found error.


Then copy and paste the code below to your .htaccess file:
ErrorDocument 401 /401.html
AuthName "Secure Area"
AuthType Basic
AuthName "Password Protected Area"
AuthUserFile /path/to/directory/.htpasswd
Require valid-user
After saving your changes, make sure you upload the file to the folder you wish to password protect.
Make sure you type in the full path in the AuthUserFile section. This path is usually like below:
home/user/public_html/website/directory/.htpasswd
Then add the text below to your .htpasswd file and upload it in the folder you wish to password protect:
user: password
This way you can create a username and password on each line.
Advanced Plugins to Password Protect WordPress Site
Above we have mentioned a few plugins to password protect your WordPress. Here are some other plugins to password protect your WordPress website:
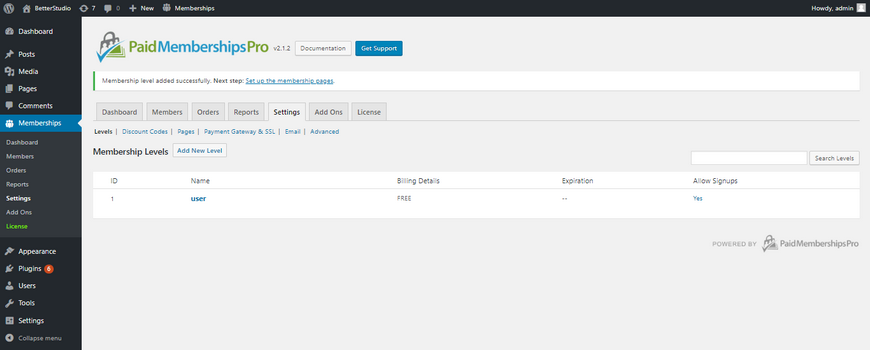

This plugin only allows registered users to access your website’s content. (posts, categories, forums, and web pages)
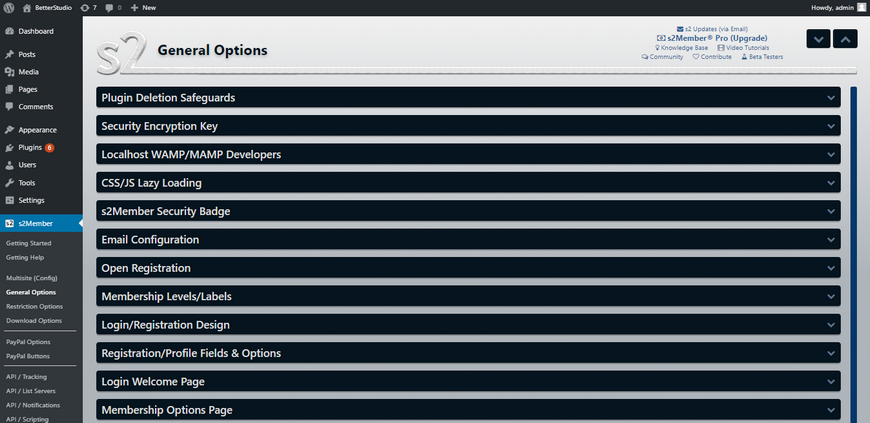

If you are looking for a simple plugin, s2Member is the perfect option.
S2Member adds a password to your posts, downloads, pictures and etc.
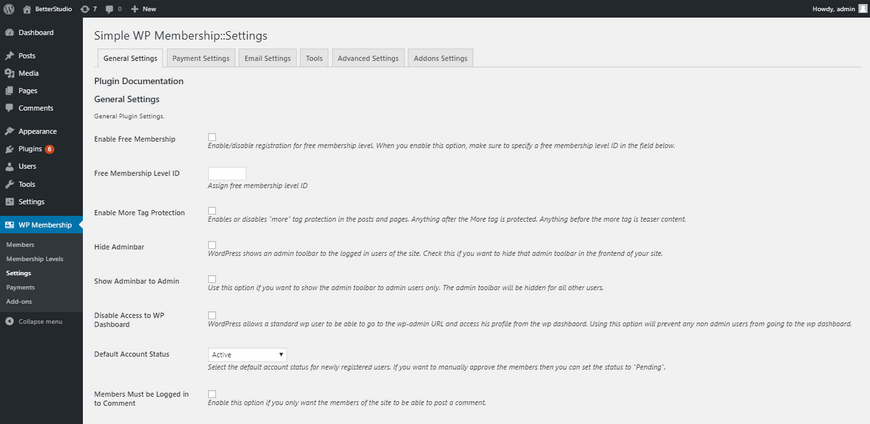

This plugin is very user-friendly. This plugin works similar to others mentioned above.
Other than the plugins we mentioned above, you can use WP-Members and Membership & Content Restriction – Paid Member Subscriptions plugins to password protect your WordPress website.
Password Protected Categories Plugin
You can also password protect your WordPress with premium plugins. Password Protected Categories is a premium plugin. As you can probably tell, you can use this plugin to password protect your categories.
This plugin allows you to have different visibility for each of your categories.
To learn how to install plugin using zip file, read our related article.
After installing and activating, you need to configure the Password Protected Categories plugin. From your WordPress Settings click on Protected Categories.
In the License Key, enter your activation serial number.
From the Password Expiry tab, you can define the expiration date for each of your passwords.
In separate settings, you can choose whether you want to hide your password-protected posts or not.
In addition, there are complete features for the login page.
Type in your subject in the Title and your message in the From Message box.
Once you are done with configuring the plugin, make sure you click on Save Changes.
To password protect your WordPress categories with the Password Protected Categories plugin, follow the steps below:
From your WordPress dashboard click on Posts and then Categories. In the opened page, you can enter your category and slug.
In the Visibility section, change your visibility mode to Password Protected.
To change the display type, hover over the category you want and click on Edit. In the opened window, check the desired category.
Conclusion
In this article, we tried to introduce ways to password protect your WordPress website. By using plugins, you can password protect your content, categories, and even WooCommerce products.
For further research, we recommend that you refer to our article on the best security plugins for WordPress.
If you know any other ways to add a password to different sections of WordPress, please let us know in the comment section below.


