WordPress Stress Test is a method of finding how far you can push your website and where is its breaking point. To Stress Test WordPress you need to test your loading speed, setup quality, plugin performance, and more importantly, you need to Load Test WordPress.
There are many ways to analyze a WordPress website. You can choose your preferred tool out of hundreds of options out there. You only need to enter your website’s URL in one of these online tools to analyze your website.
You can analyze and improve your website’s performance by running tests. By doing so, you can improve your website and make sure everything is working perfectly fine.
In this article, we talk about the WordPress stress tests and introduce ways to improve your website’s speed.
The speed of a website is very important to visitors. As we mentioned in previous articles, visitors expect a fully loaded website in less than 2 seconds.
As you can probably tell, this is a hard task to achieve. Although, there are many methods to increase your website’s speed. In addition, there are many ways to analyze your WordPress website.
What is WordPress Stress Test?
Before anything, you need to know what is a WordPress stress test. WordPress stress test or loading test is a method in which you send a certain amount of traffic to a particular website, so you can test how well the system works and how well it can handle the traffic.
A stress test can be done in different environments and scenarios. For example, you want to see how well your website performs during peak hours and how fast it loads. Then you can compare the results with the low-traffic result.


By doing so, you have done a WordPress stress test. Generally, a stress test means simulating a huge number of traffic on your website and seeing how well your website can handle it. As a result, you can prepare yourself for the actual traffic.
Your website may not have Facebook’s daily, weekly or monthly traffic. So, don’t test your website with too much traffic.
The main goal behind the stress test is to prepare yourself for big traffics on your website. Therefore, simulate a realistic number.
Before You Begin the Stress Test
As mentioned above, the WordPress stress test is done by sending fake visitors to your website. Before running the test, remember these points:
- If your WordPres hosting plan has a limited bandwidth, you may reach the limit because of the test. Therefore, watch your costs.
- When you run a WordPress stress test, your website may be unavailable for some users. Because your website cannot respond to the high volume of requests.
How to Stress Test WordPress
Now that we’re familiar with the WordPress stress test, let us begin. There are tools that perform the stress test from zero to a hundred and give you a detailed analysis. But they come with a price.
In this article, we explain how to go step by step and perform a free stress test.
1. Test WordPress Loading Speed
The first effective method to test your website’s performance is to test its loading speed.
The most basic way is to open your website in a new browser and see how long your website takes to fully load.
Although, since this is the most basic way to check your website’s loading speed, you won’t get any crucial information other than the loading time.
If you are looking for more details, we recommend using Pingdom.
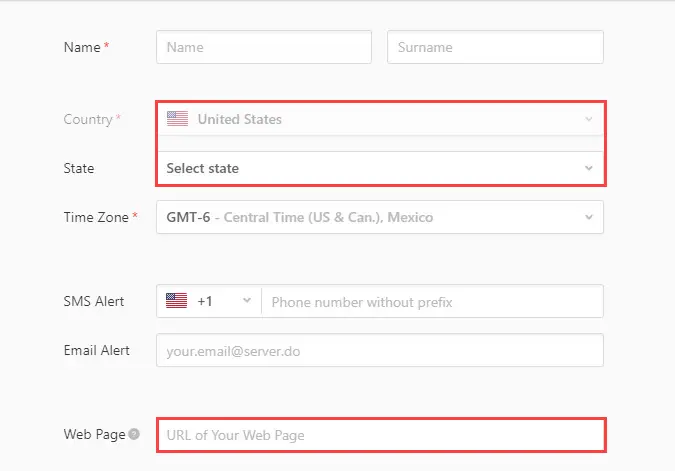

In Pingdom, you enter your website’s URL then in the “Test from” select a location where most of your actual traffic is coming, or you can select your targeted location.
Finally, click on the Start Test. In a matter of seconds, you get exact and detailed information about your website’s speed.
2. WordPress Load Testing
Your next task is to test your website’s acceptable traffic. To run this test, we recommend using the Load Impact.
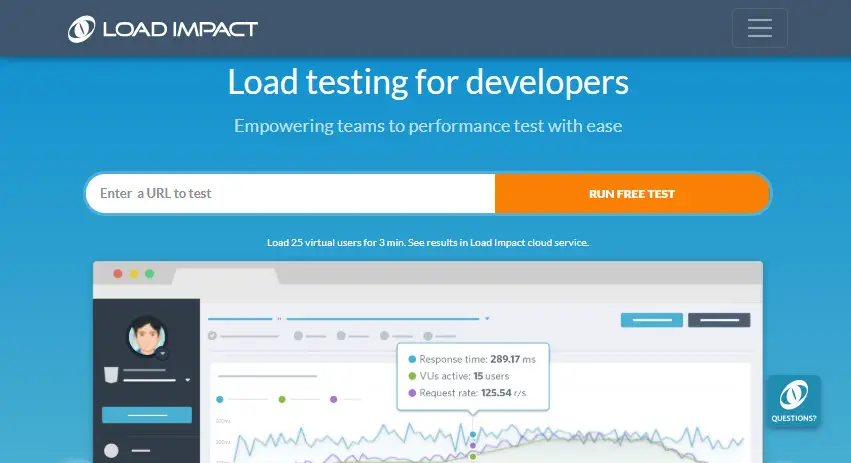

You just need to enter your website’s URL and click on Run free test. This tool simulates 25 users on your website.
The main goal is to see how well your website performs while having high traffic. The test can take up to 5 minutes.


Once it’s done, you are presented with a detailed chart. At first glance, this chart may be hard to read and understand but it’s actually very simple.
The green line is the number of views (written as VUs) Load Impact sent to your site.
As you can see it is increasing gradually to see how the site performs while the views are going up.
The blue line is the time it took your site to respond. You can see a glitch in the chart above, but mostly the site handled viewers well. If the blue line has a sharp slope, you need to look at your site’s performance under pressure.
The violet line is the number of requests sent to the server. Normally it should go up as views are going up. But you can lower the number of requests through means of optimization such as serving resources from a consistent URL.
3. Test Website’s Setup Quality
The next step is to check your website’s installation quality. Like any other web application, WordPress is built with big and small scripts and mechanisms.
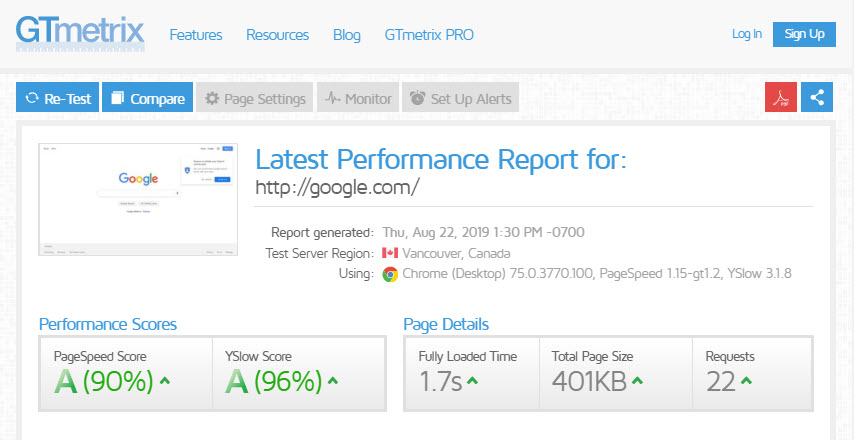
It’s the combination of these that makes WordPress the most powerful and popular CMS on the world wide web. GTmetrix is used to check these elements. This tool offers you many ways to test your website.
Just like Pingdom and Load Impact, you just need to enter your website’s URL and run the test. After a while you receive a detailed list of all the tests run on your website:
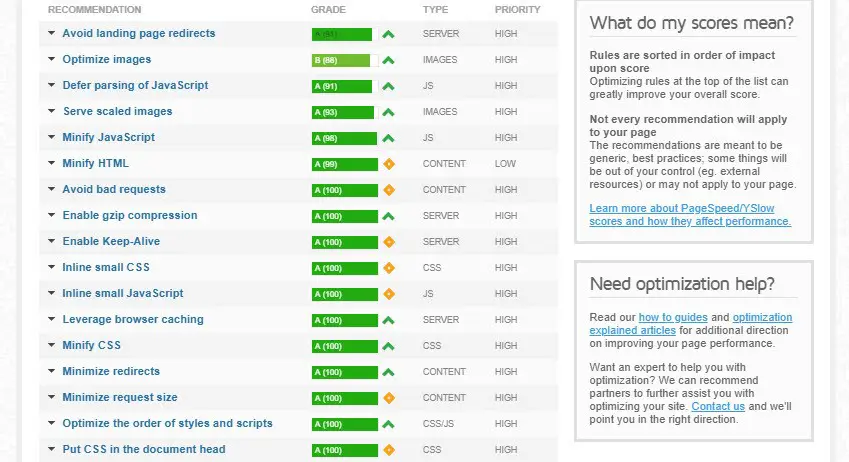

- Image Optimization
- JavaScript Optimization
- Browser Cache
- CSS Optimization
- HTTP Requests Optimization
- Redirects
- etc.
GTmetrix gives your website a score. For example, if your website doesn’t have good performance and all the points mentioned above aren’t done correctly, you receive the lowest score.

4. Test WordPress Plugin Performance
The last piece of the stress test puzzle is testing your plugin’s performance. To check your plugin’s performance, install Plugin Performance Profiler.
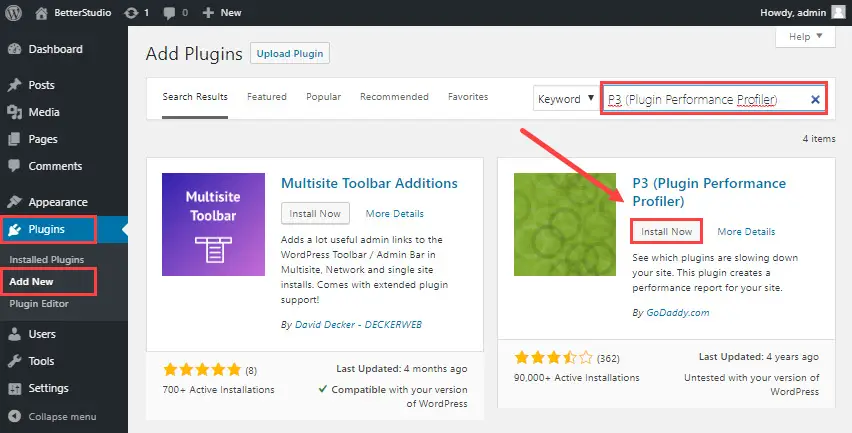

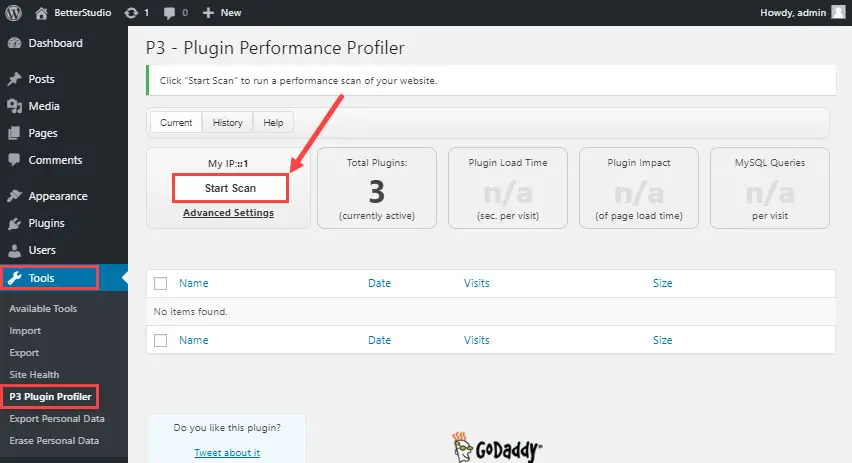
First download the plugin, then install and activate it. Then go to Tools > P3 Plugin Profiler. Click on Start Scan, then Auto Scan to start the process.

After a while, you will see the results in a chart. This chart tells you how each plugin individually impacts the overall speed of your website.
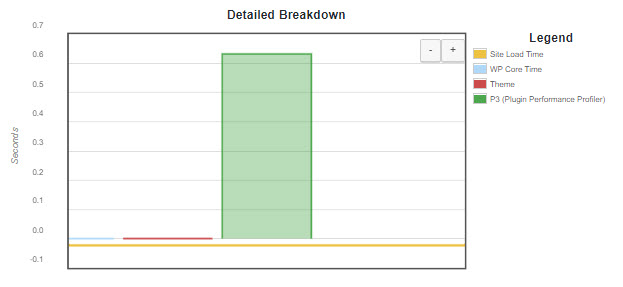

By using this chart, you can look for plugins that have slowed down your website. Then replace them with better plugins or completely remove them.
How to fix WordPress Performance Issues?
After running the WordPress stress test, you need to check the results to see if there are any room for improvements. How can you increase your website’s loading speed and performance? Here are some suggestions.
Increase WordPress speed
If your website is too slow, you need to optimize your resources. Below we have listed some common ways of optimizing WordPress.
1. Use CDN
Using CDN is one way to increase your website’s speed. CDN is short for Content Delivery Network.


This system increases your website’s speed. CDN splits requests and sends them to broadcast servers over the network. As a result, the closest server to the user sends the requested information.
2. Optimize WordPress Images
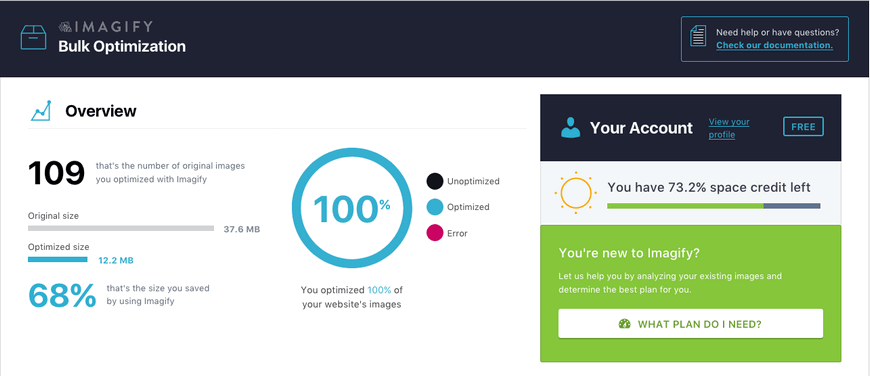
Optimizing your images is another way to increase your website’s speed. Everyone loves high-quality images and every website depends on high-quality images in its content.
On the other hand, they can damage your website’s loading time. You can optimize your images using a WordPress image compression plugin or optimize WordPress images without a plugin.

3. Install cache plugins
Another way to increase your website’s performance and speed are to use cache plugins. The cache is information stored in the temporary memory. For example, you have hundreds of users on your website. In this case, your website will have a difficult time responding to each of them.
This alone increases your website’s performance and speed. There are many cache plugins in WordPress. However, we recommend W3 Total Cache and WP Super Cache.
Your website may need more time to respond to each request. Now imagine if you are using a cache plugin to display your website to your users. The plugin saves your website from answering repetitive requests. Because all your user needs are saved in the cache.
4. Use GZIP format
Another method to increase your website’s performance is using the Gzip feature.
Gzip compresses your files. As a result, your website needs a lesser time to load all the files on your server. Gzip compresses your files before sending them to your server. Then, the browsers unzip them and display them to the user.
You only need to add a few lines of code to your WordPress website to enable Gzip. We have completely explained Gzip in another article.
There are many other ways to increase your website’s performance and speed. For example:
- Optimizing your WordPress database
- Using optimized fonts
- Optimizing JavaScript and CSS files
- Using a better hosting provider
- Using optimized plugins
- Etc.
What if WordPress Cannot Handle the Incoming Traffic?
As we mentioned above, by running the WordPress stress test you send a lot of fake traffic to your website. Some servers cannot handle the incoming traffic. Therefore, this process will be unfinished. Remember these points while running the WordPress stress test:
- Use distributor servers like CDN
- Compress your images
- Minimize HTTP requests
- Create a static page of your website. Increase your website’s speed by using cache plugins.
- …
Finding Troublesome Plugins
Plugins are part of every WordPress website. By using plugins, you can add many great features to your WordPress website, without having any programming knowledge or manually doing anything.
Yes, having many plugins can open a whole new world to you and your website. On the other hand, they can increase the loading speed of your website.
One method to fix this issue is to deactivate troublesome plugins or replace them with better plugins. You can do so by using the P3 plugin. We have mentioned this plugin above.
By installing the P3 plugin and scanning your installed and activated plugins, you can locate the troublesome plugins. By using this plugin, you can check which plugins are causing your website to load slower.
Conclusion
By running the WordPress stress test, you can check your website’s performance.
The stress test is mainly concerned with how your site works under pressure. Always optimize your files and codes to have smaller objects to load and fewer requests to make. Although, sometimes the best way is to move to a server with better resources to offer.


