Sometimes in WordPress to fix some issues, you may need to uninstall and reinstall WordPress. Although, this is always the last resort. If other methods of fixing your website didn’t work, reinstalling WordPress is always the last chance of fixing issues.
Uninstalling WordPress could be tricky. Because you want to uninstall WordPress and at the same time you don’t want to lose any data and content. In this article, we discuss how to properly and safely uninstall WordPress and reinstall it again.
WordPress is the most popular CMS around the world and its very easy to use. Although, sometimes WordPress users receive errors and there is no way to fix them. These errors could be related to your database or due to viruses.
As mentioned above, uninstalling and reinstalling WordPress could be the only fix to some errors. Below we teach you how to uninstall WordPress.
When and Why Do You Need to Reinstall WordPress?
The question is why do we need to uninstall and reinstall WordPress? As we mentioned above, this may be your last resort to fix unknown errors. Most occurred errors in WordPress are easily fixed. Don’t attempt to uninstall WordPress unless you really need to.
If you have tried every possible way to fix your WordPress errors and failed, then it’s time to use the last resort. If you uninstall WordPress properly there is no need to touch your WordPress’ core files, therefore, you won’t lose any crucial information from your website.
How to uninstall and reinstall WordPress?
The idea behind reinstalling WordPress is to fix unknown errors. Follow the steps below to properly uninstall WordPress without losing your information.
Make sure you are following the steps below. Otherwise, you may lose crucial information. Let us begin:
Step 1. Create a Backup
The first and most important step you need to get backup your WordPress website before uninstalling. Usually, before you make any changes to your WordPress website, you need to get a backup. You can use plugins to get a quick backup.
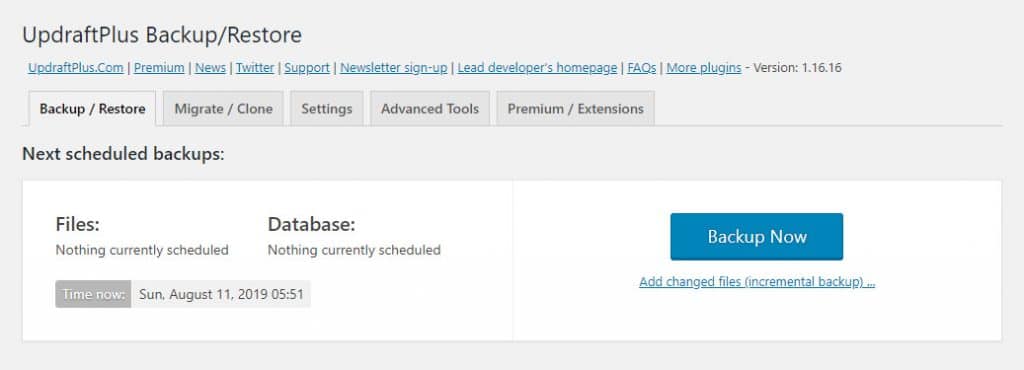

One of the most popular plugins to get a backup of your WordPress website is UpdraftPlus. To use this plugin, first, download it from the official WordPress website. Install, then activate it.
Don’t forget to download your backup on your computer and upload a version on your Google Drive or DropBox. This is just to make sure you won’t lose your WordPress information.
Step 2. Export Your WordPress Site Contents
Your work has just started. The first step you need to take after getting a backup of your website is to export your WordPress content. Your content includes your posts, pages, comments, categories, tags and etc.
You can restore this later straight through WordPress panel. To export WordPress files:
1. Login to your WordPress dashboard.
2. Select Tools.
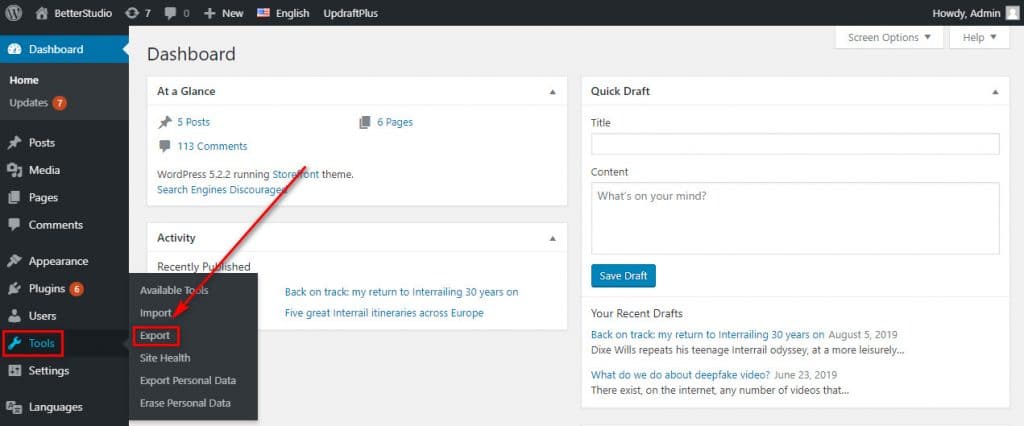

3. From the opened menu click on Export.
4. In the Export page, click on All content.
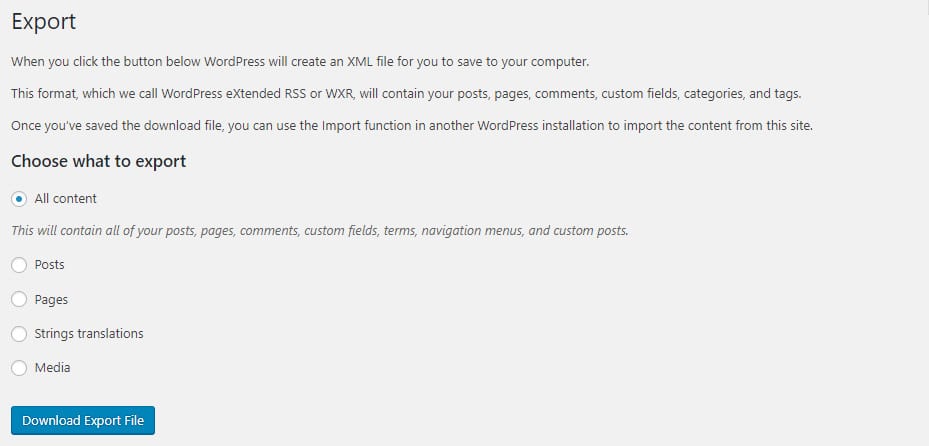

5. Finally, click on Download Export File to download your files.
By following the steps mentioned above you can easily export your files.
Step 3. Download wp-content Folder of WordPress
The next step in this process is to download your wp-content folder. As you know, all of your themes, uploads, images, and plugins are stored in this folder. Downloading this folder is crucial in future steps.
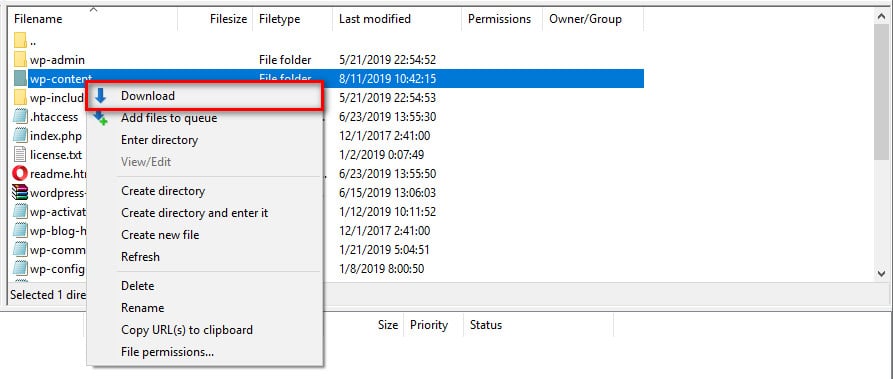

From your FTP account or cPanel connect to your website. In the File Manager (your root directory) look for wp-content. Next, download the folder to your computer.
Step 4. Properly Uninstall WordPress
Once you have downloaded wp-content, you need to begin uninstalling WordPress. Connect to your WordPress via an FTP account or with cPanel. Then, you need to delete your WordPress files.
Keep in mind, in this process, you don’t need to delete your database files.
As you know, most hosting providers allow their users to create as many databases as they want. With different usernames and passwords. Therefore, it is best to create another database for your new WordPress website.


To create a new database, login to your hosting panel. From Databases click on MySQL Databases and enter create a new database page. First, you need to choose a name for your database. Then, click on create a database. Scroll down and locate MySQL Users.
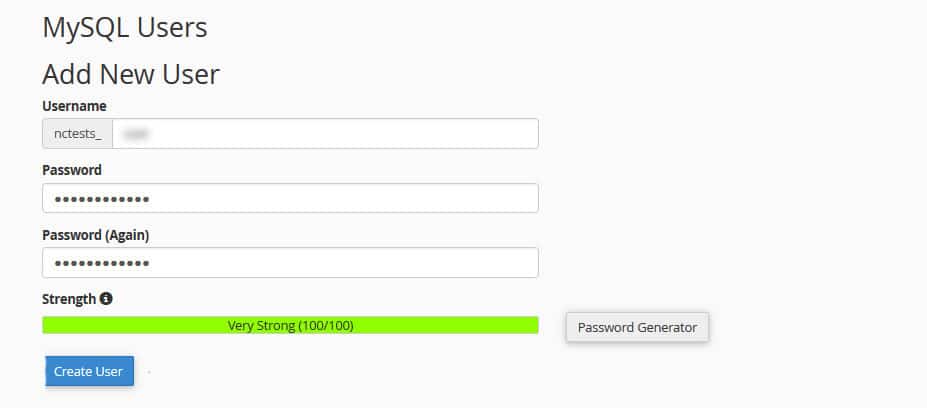

Here, you need to identify a user for your database. Choose a new username and password. Then click on Create User. After creating your database and user, you need to connect them together.
To connect your created user to the database, scroll down until you see “Add user to database”. Then, select the database and user account you have created before. Finally, click on Add. This is every step you need to take to connect your new database and user together. The database you have created will be used in the new WordPress website.
Step 5. Fresh Install WordPress
After deleting your WordPress files and creating your database, you need to reinstall WordPress. To do so, you need to download the latest version of WordPress from the official WordPress website. Once you download the file, you need to unzip it.
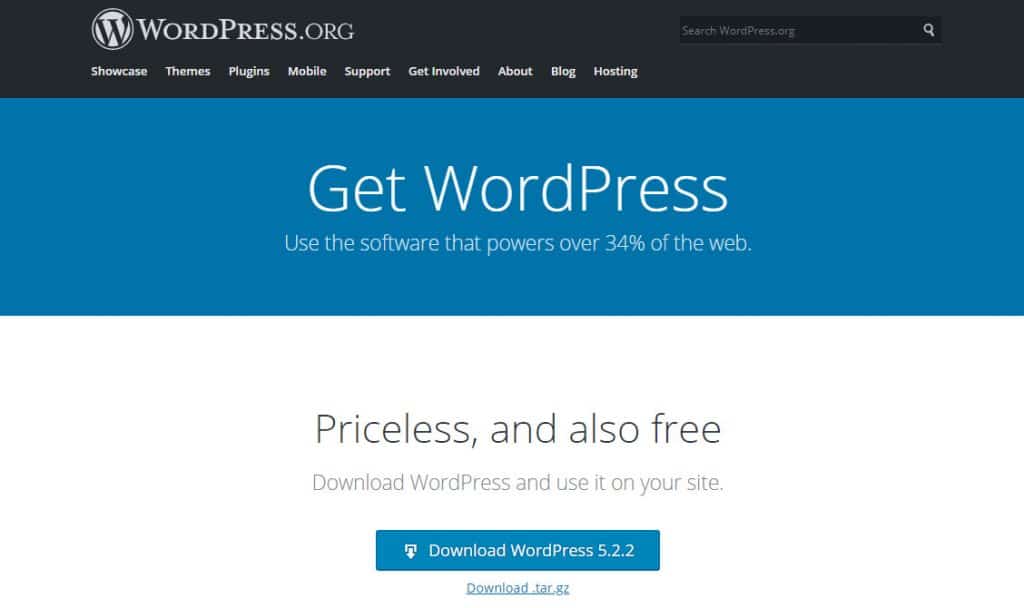

By opening the WordPress folder, you can view all the available files. From your FTP account, upload these files to your host. Once you have uploaded the files, open the website in your browser.
In the installation process, you need to enter your new database information. You only need to type in the database you have created in the previous step. Set Database host to localhost. Once you have entered every required information, click on Submit.
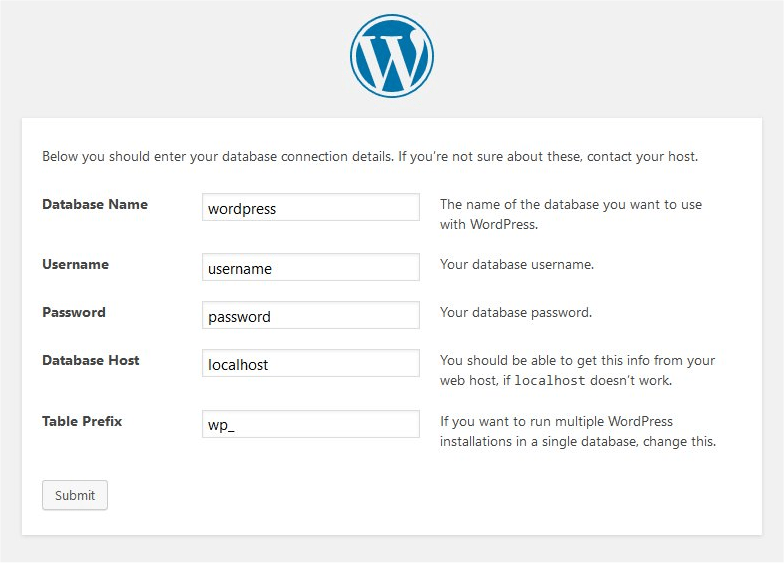

Once your database and WordPress are connected together you receive a message, at the bottom of the message click on Run Install. This will begin reinstalling WordPress on your server.
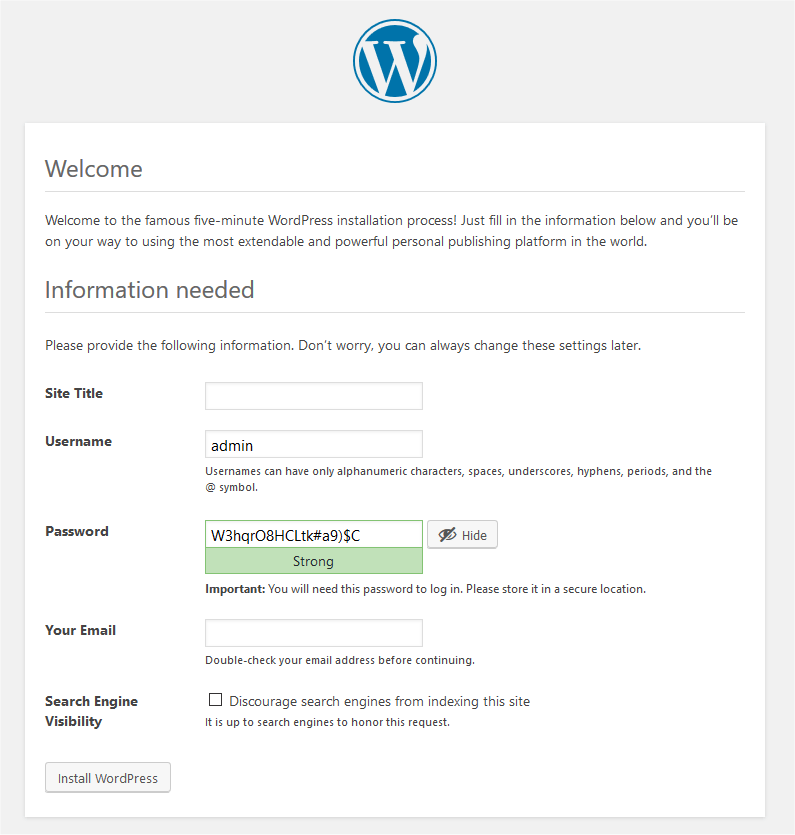

In the next step, WordPress will ask you for information about your website. For example, title, description, admin email, and password. After entering the required information click on Install WordPress.
Once the process is finished, with your new admin username and password, login to your WordPress dashboard. After logging in to WordPress for the first time, delete the “Hello World” post. To do so, click on Posts and delete the post. Also, go to the Comments section and delete every available comment on your website.
You have successfully reinstalled WordPress. Now you need to restore your website.
Step 6. Restore Uploads, Images, and Themes
To restore your uploads, images, and themes, you need to upload the wp-content folder you downloaded in the previous step.
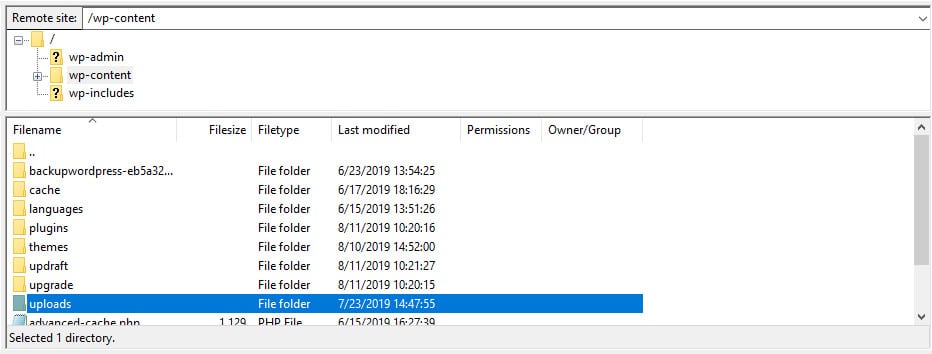

Connect to your website with an FTP account. Go to /wp-content folder. Then, from your computer, upload your Uploads folder.
This is all you need to do to restore your Uploads, Images, and Themes.
Step 7. Import WordPress Site Content (Exported Contents)
Now it’s time to restore your posts, pages, comments and anything else you had on your website. From your WordPress login page, go to WordPress dashboard. From the dashboard, click on Tools and then Import.
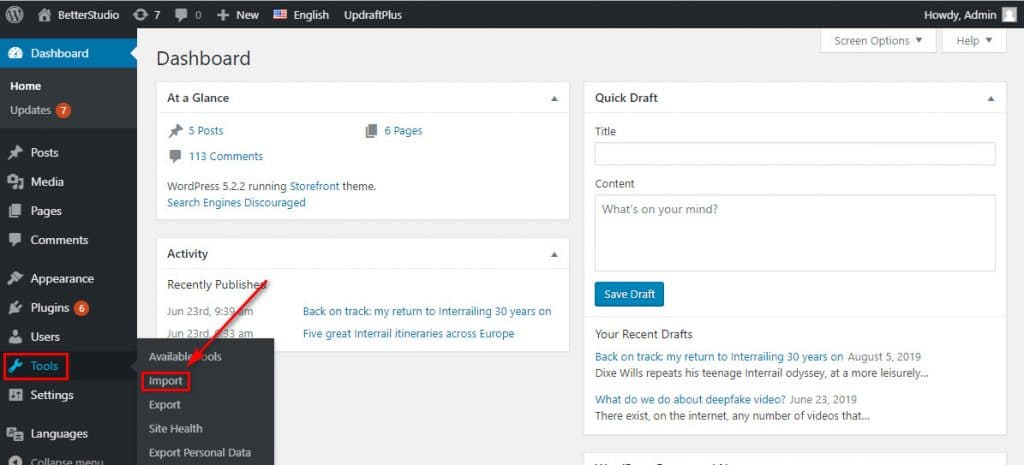

Click on Install now under WordPress. By doing so, you install the WordPress Importer. You need this add-on to restore your WordPress content.
Once installed, click on Run Importer. You will be redirected to the Import page. Then click on Choose File.
Now upload the .xml file you exported from the old site. Once selected, you have to click on “Upload file and import”. WordPress will ask you whether you want to publish your content with a new user or available users on your website.


If your new WordPress website has one user and that is you, your content will be published under your name. But if you have more than one user, don’t need to do anything. WordPress will automatically select a user.
Make sure you check “Import Attachments”. This option makes all the image content you had in your posts to get downloaded from wp-content/upload. Finally, click on Submit to begin the process of restoring your content.
Once this process is finished, you can visit your website and make sure all of your content is back.
Step 8. Install WordPress Plugins (One by One)
The last step in reinstalling WordPress is to reinstall your plugins. You need to install and activate the plugins one by one
To install them, you need to download them from the official WordPress website or just add them through Plugins> Add new.
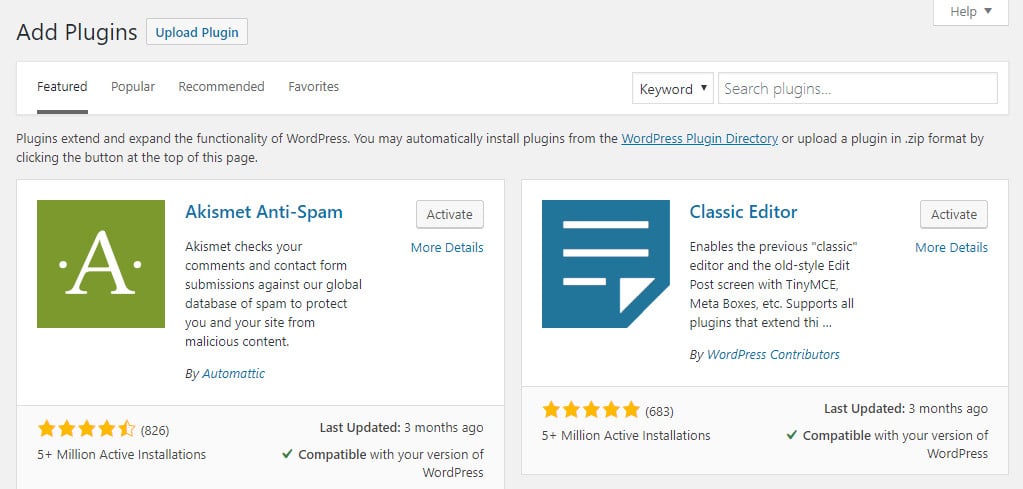

To personalize your plugins, you need to configure them once they are installed.
Summary
In this article, we discussed how to uninstall WordPress and reinstall it without losing your content. If you follow the steps mentioned above, you can restore backup of your WordPress site any issues. Even if anything happens during the installation, don’t worry, because you have a backup of your previous website.


