Would you like to know how you can add fonts in Microsoft Word? You have access to a wide selection of fonts in Microsoft Word, but depending on your goals, you might want to use a font that’s not included in the list. Fortunately, installing fonts on Microsoft Word is simple.
It is possible to add and install new fonts in Word to add a bit of personality to your documents. In this article, we will explain how you can add fonts on Word in various operating systems.
How to add a custom font to Microsoft Office?
The Microsoft Office fonts included in Microsoft Word are automatically installed when you install the program. There may be times, however, when you wish to install custom fonts that you have created, purchased, or downloaded from another source.
This section will provide instructions on installing the fonts so they can be used in Word. Follow the sub-sections to know how you can add a font to Office.
How to Add a Font into Word on Windows?
When you add a font to Word on Windows, it is easy and only takes a few clicks.
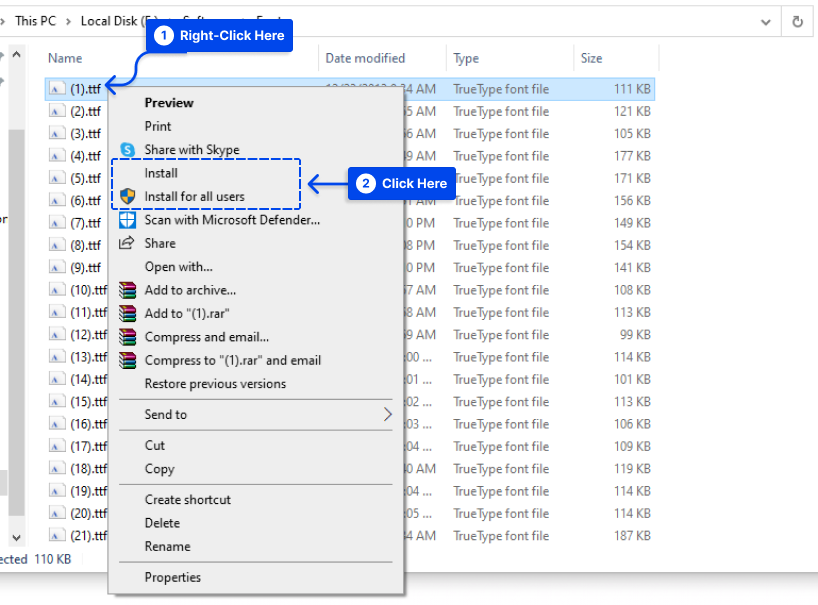
Follow these steps to add fonts to Word on Windows 10:
- Right-click the font file on your computer.
- The context menu will appear; click Install to install the font for the current user or Install for All Users to install it on your computer.
Note: it is necessary to have administrator privileges to install a font for all users.
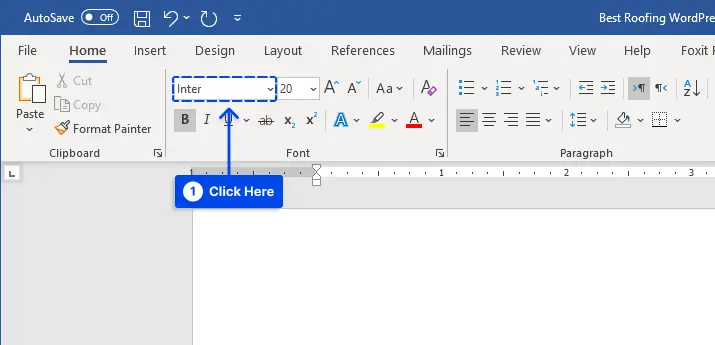
- Now, you can open Microsoft Word and select the installed font from the fonts list.
In a few moments, you can see the font in various apps, such as Excel, PowerPoint, and Word, on your Windows device.
If you want your new font to be the default font in Word when you create a new document, ensure that it is set as the default font.
How to Import Fonts Into Word on Mac?
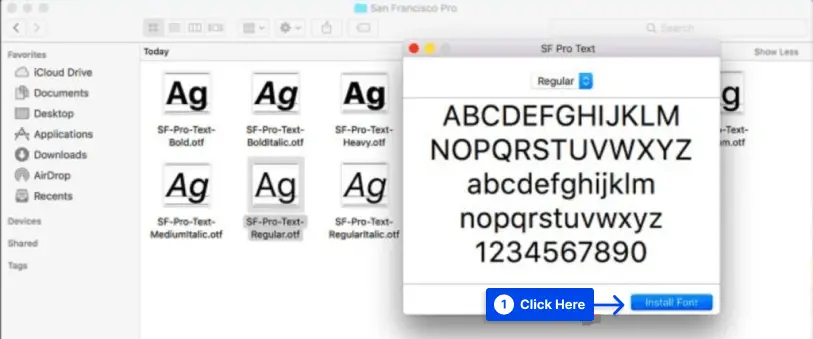
New Microsoft Word fonts on Mac must be added to the Font Book application for managing fonts on macOS. Follow these steps to do this:
- Double-click the font to see the font preview window.
It may be necessary to unzip the file prior to using it.
- Click on Install Font near the bottom of the font preview window to open the Font Book.
Note: The font file must also be dragged and dropped into the Windows Office Compatible collection in the Font Book’s left sidebar if you are using the 2011 version of Office for Mac.
- Restart your Mac.
After the process, word and most other office applications, including PowerPoint and Excel, should support the font.
How to Add Fonts to Word Online?
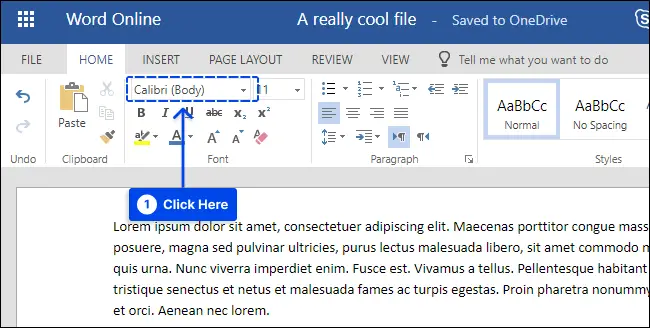
The Microsoft Word Online app, part of Microsoft 365, can use any font installed on your system.
Follow these steps to do this:
- Click the Font Options button and enter the name of the font file, excluding its extension.
The font name will appear in the font options box when the document is saved and will be displayed correctly for users who have that font installed on their computers.
Unfortunately, Word Online does not allow the embedding of fonts.
How to Add Fonts to Microsoft Word for Android?
Adding fonts to the most recent version of Microsoft Word for Android is much more challenging. Your device must have root access before you can begin.
Follow these steps to do this:
- Download FX File Explorer and install the root add-on on your rooted Android device.
- Locate your font file using FX File Explorer.
- Choose the font file by pressing and holding it for a few seconds, and then tap Copy in the upper right corner of the screen.
The upper right corner of the screen will display an icon that reads “1 copied” if the process has been successful.
- Close FX File Explorer, locate MS Word and hold your finger on the file icon to display a menu.
When your device has been rooted, you will see an Explore data option in addition to the Open and Uninstall options.
- Tap on Explore data and find the font directory by navigating to Files > Data > Fonts.
- Tap the “1 copied” icon in the upper right of your screen to paste the font file inside the font directory.
- Select Paste from the menu that appears.
There will now be an option to select the font in Microsoft Word.
How to Add Fonts to Microsoft Word for iOS?
Adding a font to your iPhone or iPad requires an app such as AnyFont, which can be downloaded from the App Store.
Follow these steps to add fonts to Microsoft Word for iOS:
- Place the desired font file in your iCloud.
- In iCloud, tap the font file, then Share, then More in the upper right corner of your screen.
- Tap AnyFont from the Apps menu.
Upon opening AnyFont, you should see the font file you selected.
- Tap > next to the font on the right side.
- Tap Install on the next screen that appears.
- Tap Allow if prompted to allow a configuration profile download.
- Go to Settings, then General, then Profiles.
- Select the font under Downloaded Profile.
- Tap Install in the top right corner.
- Tap Next.
- Tap Install on the Unsigned Profile window.
- When asked for confirmation, tap Install.
- Tap Done.
- Open Word and select font under iOS Fonts.
FAQ
In this section, we answer some of the most frequently asked questions:
On a Mac, select File > Print > PDF > Save as PDF > Save to convert the document to a PDF and embed all fonts.
The embedding of fonts should also be done automatically during Word to PDF conversion on Windows.
Open the PDF in Acrobat Reader, then select File > Properties > Fonts tab to ensure your fonts are embedded.
If you are using Windows, open the Control Panel and search for fonts, then select the font you do not wish to use and select Delete.
On a Mac, open Font Book and pick the font you want to remove, then select File > Remove.
It is usually sufficient to close and reopen Microsoft Word to refresh the font list. If this does not work, you may need to reinstall the font.
You should never rename a font while it is in the installed folder; otherwise, the font could become corrupt. In this case, the font should be deleted and reinstalled.
You may rename the font before you place it in the fonts folder by right-clicking it and selecting the “Rename” option. Having named it as you wish, put it in the fonts folder as you would typically do.
Conclusion
The ability to add fonts to Word is available to give your documents a bit more personality. This article described how you could add fonts to Word under various operating systems.
We hope that you will find this article useful. Please do so in the comments section if you have any comments or questions.
In order to keep up with our latest articles, we plan to post them on social media platforms such as Facebook and Twitter. Follow us on these platforms to receive them.


