Imagine you are a Spanish speaking national and after installing your WordPress website every menu is in English. In this case, not only every word needs to be changed your whole dashboard needs to change as well.
When you download WordPress from its official website, the default language is English. A lot of non-English speaking people would like to have their WordPress website in their own language. Although, some prefer to keep English along with their mother tongue.
There are many ways to change the default language on your WordPress website. In this article, we will teach you how to change the WordPress language.
How to Change WordPress Default Language?
One of the easy ways to change the language of your WordPress website is through the WordPress dashboard.
This method is the most straightforward method to change the default language on your WordPress website. It is used when you want to change the entire language of your website.
For example, you want to change the language of your website from English to Spanish.
To change the default language on WordPress follow these steps:
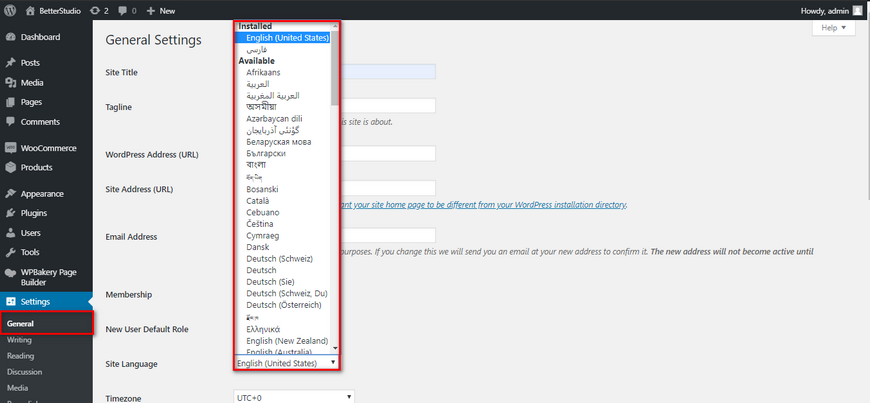

- Enter your WordPress dashboard
- Go to settings
- Select general
- Scroll down until you see “Site Language”
- From the drop-down menu select the language you want
- Make sure you click on save once you have selected your preferred language
Now you have changed the default language on your WordPress website.
How to Manually Install a Language in WordPress?
Sometimes when you want to change your WordPress language, you can’t quite find the language you are looking for and you really need to change the language of your WordPress website to reach more audiences in your targeted country.
In this case, you need to download the language pack you are looking for and manually install it on your WordPress website.
As an example, we will install Albanian on our website. You can’t find this language in your WordPress settings. Follow these steps:
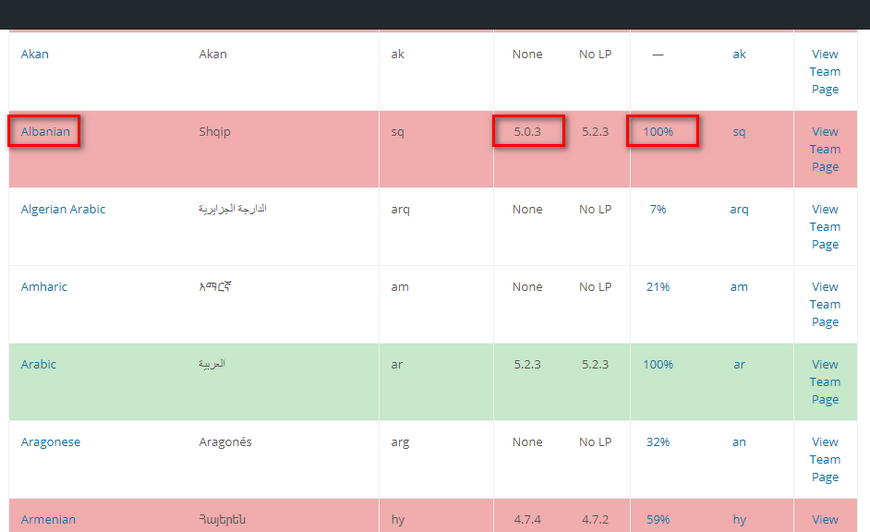
1. Go to WordPress translation team page
2. Find your desired language
3. Click on 100% in front of the language

4. From the Set/Sub Project column, click on your WordPress version
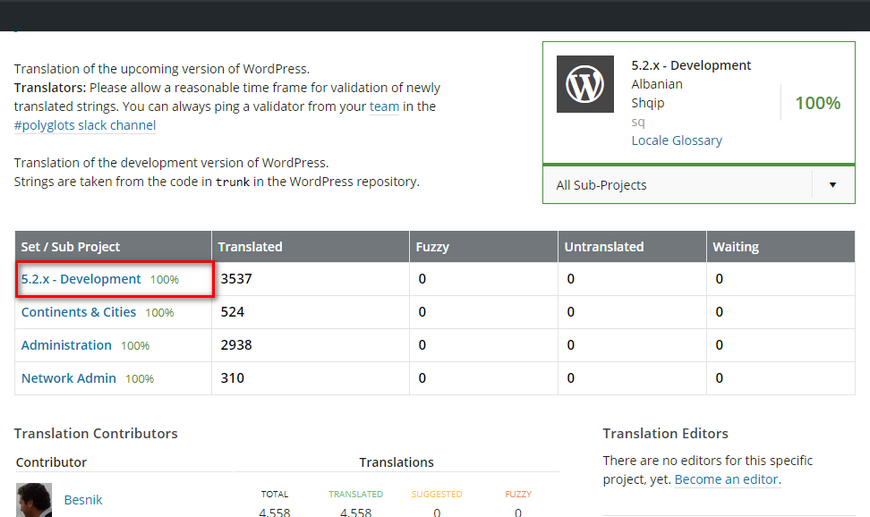

5. In the new page find “Export”
6. Make sure the format is set to Machine Object Message Catalog (.mo)
7. Click on Export to download the file
Now that you have downloaded the language you were looking for, it’s time to manually install it on your WordPress website.
To manually install a language on WordPress website follow these steps:
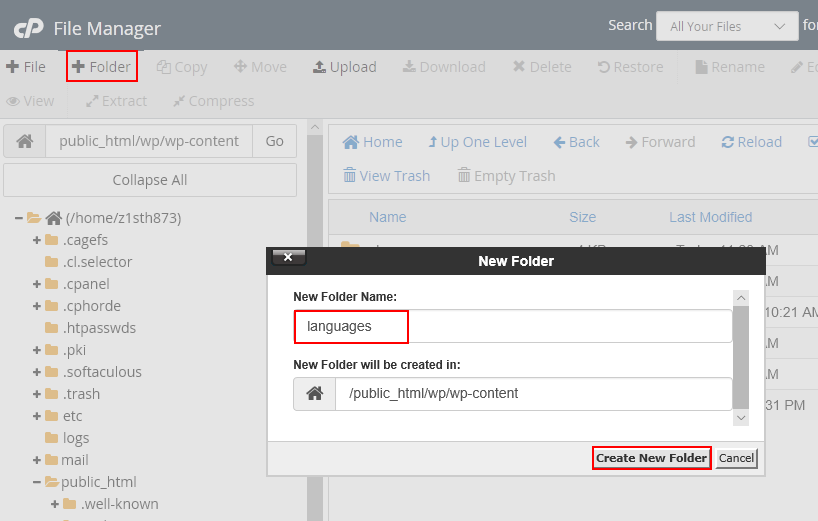

- Head over to your cPanel
- Locate File Manager and click on it
- From the wp-content look for languages folder
- If for any case there is no languages folder, make sure you create by right-clicking on the page and selecting “New Folder” and name it languages
- Open the folder and click on upload
- Now upload the language pack you have downloaded and finally close the window
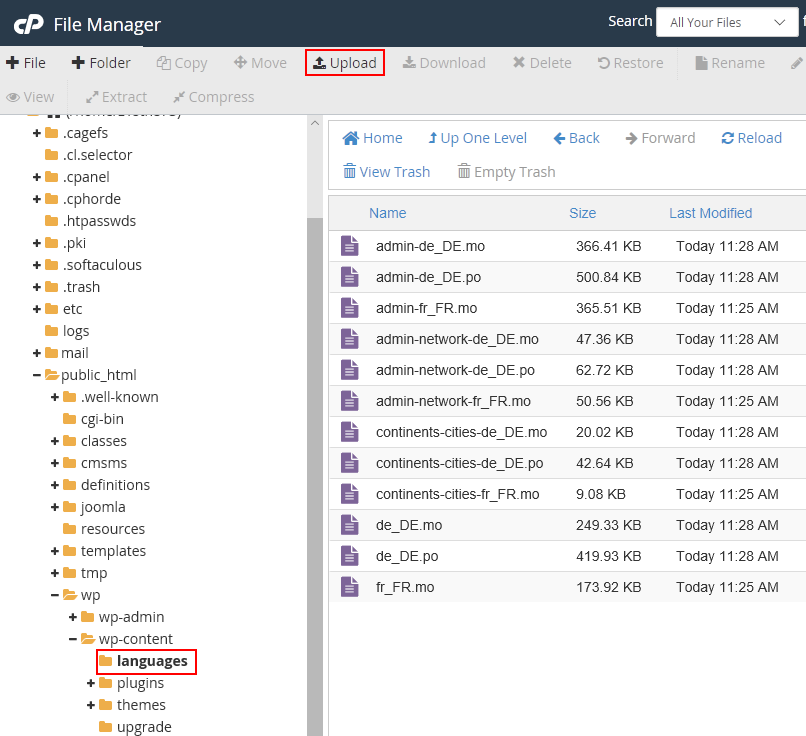

Now you can head over to your WordPress dashboard > settings > general and scroll down until you can see “Site Language”. From the drop-down menu look for the language you have installed.
Once you have selected your language make sure you click on save.
How to Create a Multilingual WordPress Site?
Creating a multilingual WordPress website is different from the methods we’ve discussed above. By creating a multilingual website, every language is available to you and your audience at any time to switch to.
For this method, we recommend using a plugin. Polylang is the plugin we use here to create a multilingual website.
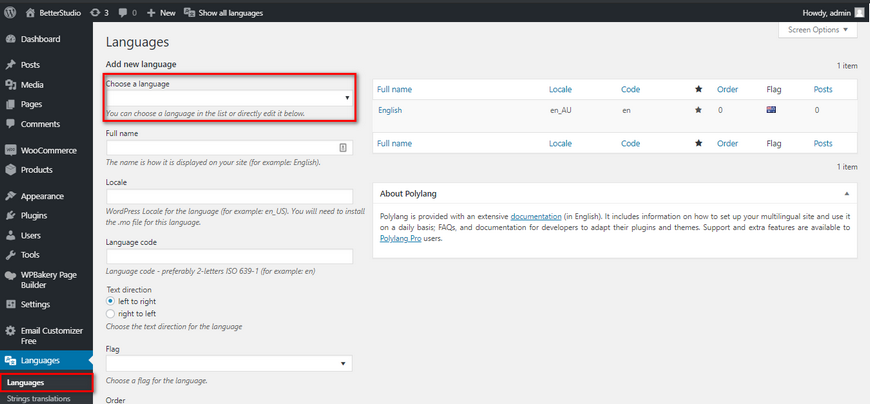

First you need to go to Plugins > Add New, then search and install Polylang, or you can download the plugin from WordPress’s official website and upload zip file to wordpress.
Once you have installed and activated the plugin, head over to Settings and select “Languages” to personalize the plugin setting.
In the languages settings, you will see three tabs. The first tab is called Languages, you can select your desired languages that you want to use on your website.
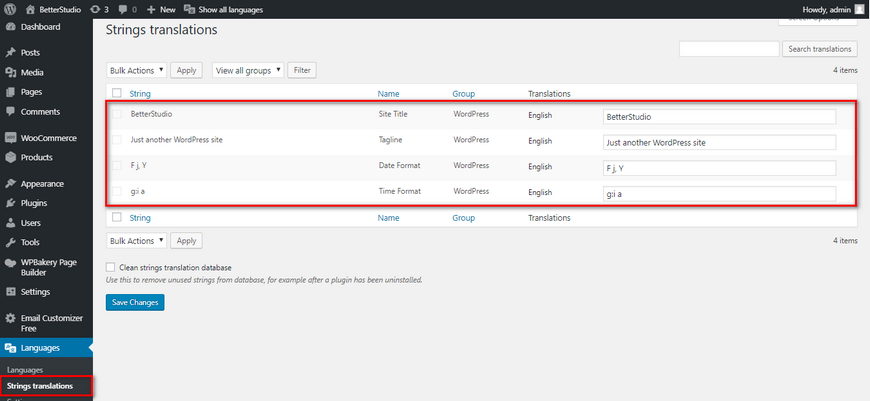

After selecting your languages head over to the second tab ‘Strings translations’.
Here you need to type in your website’s title and description in the languages you have selected in the first tab and finally select the date format.
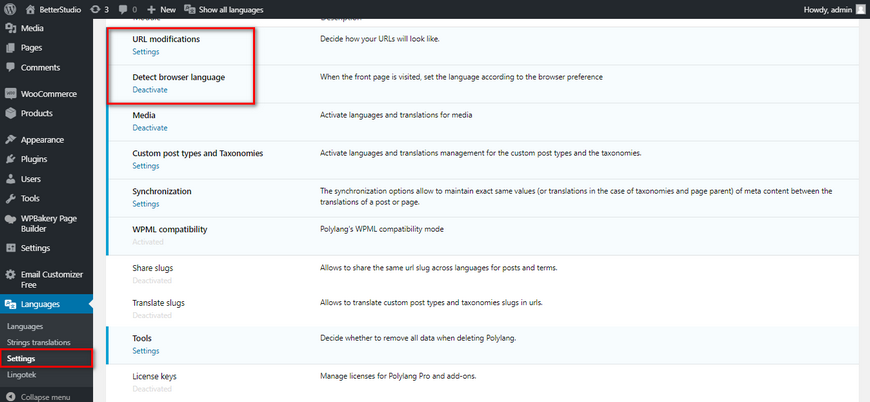

The last step is the settings tab. In this page, you can select your default WordPress language. There are other settings on this page.
For example, you can change the URL of another language. However, we advise against it. Because if the plugin breaks or stops working for any reason, you will lose all of your content.
Make sure you enable the “Detect Browser Language” option. This option identifies users language via their browser. In this case, if they want to change the language they can easily do so.


