If you use WordPress, you have probably wondered how you add an image to the sidebar. In this article we will teach you 3 ways of doing so, you may pick any you feel comfortable with.
Add Images to WordPress Sidebar Using the Image Widget
If you are not a professional in using and managing WordPress, and you are looking for an easy method to add images to the website. Using the image widget is the best option for you. This widget allows you to add images to WordPress sidebar.
Keep in mind, this widget is only accessible for WordPress v4.8 and above.
- Go to Appearance and select Widgets.
- Click “Blog Sidebar” where you want the image to be added.
- Then select “Add a Widget”.
- Now search for “image” and look for an image widget.
- Now in the “title” section pick a title for your image. This title will be shown above your image, however, this option is optional.
- Then click on “Add Image” and select your image.
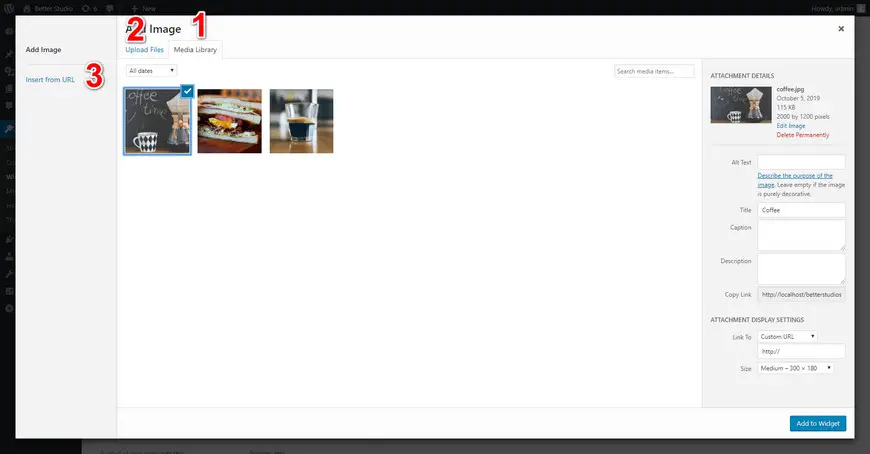
Now you have 3 ways to add your image:
- Use old images you have uploaded before on your website.
- Upload new images from your computer. (how to add images to WordPress)
- Upload new images using a URL from other websites.


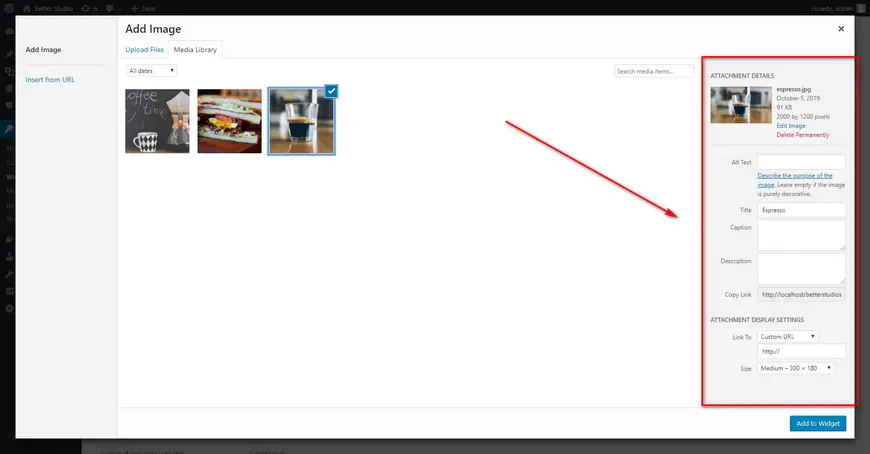
- After selecting your desired image, by clicking on “Edit Image” you may see some options on the right column. In this section, you can write a title, add a link, description, caption and alt text.

- Once you are done click on “Add to Widget”.
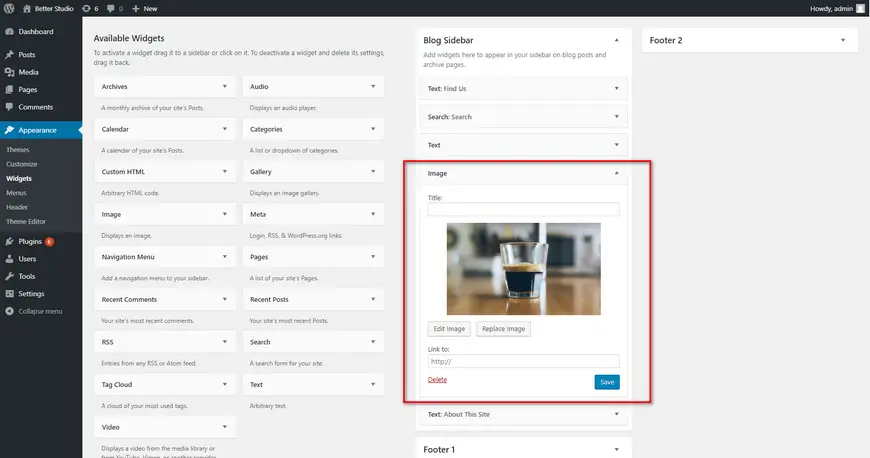
- In the end, there will a preview and by clicking on “Save” it will be added to your WordPress sidebar.
Add Images to WordPress Sidebar Using Code
The advantage of using a code to add images to your WordPress sidebar is the fact that HTML gives you more options. So if you have enough knowledge of programming, we recommend you to use this method.
- Go to “Appearance” and select “Widgets”
- Click “Blog Sidebar” where you want the image to be added.
- Then select “Add a Widget”.
- Now search for “text” and look for a text widget.
- Then select “text” and after that, you can type in the code you want.
For a standard image use the code below:
<img src="https://yoursite.com/wp-content/uploads/2017/06/image-name.jpg" alt="Describe your image" />For an image that uses a URL you can use the code below:
<a href="https://www.google.com/"><img src="https://yoursite.com/wp-content/uploads/2017/06/image-name.jpg" alt="Describe your image" /></a>For an image that you wish to be the full size you can use the code below:
<a href="https://yoursite.com/wp-content/uploads/2017/06/image-name.jpg"><img src="https://yoursite.com/wp-content/uploads/2017/06/image-name.jpg" alt="Describe your image" /></a>Keep in mind, the URLs we used in the codes above are just examples and you must replace them with your own URLs.
- Now you can go to the Visual section and see a preview of your image. This feature is very useful to see your HTML code in action.
Add Images to WordPress Sidebar Using a Plugin
If you are looking for advanced features to add images to your WordPress sidebar, then we recommend this way to you. One of the best plugins to use for adding images to your WordPress sidebar is “Image Widget Plus”. With the help of this plugin, you can create a slideshow, also, you can pick different images for different pages.

- After installing a plugin to add images to your WordPress sidebar, you need to go to “Appearance” and then select “Widgets”.
- You will see the name of the plugin you have installed, click on it.
- Now you can select the image you wish to add to your WordPress sidebar and make the necessary changes to it.


