In this article, we will explain how to publish multi-column posts in WordPress, using Gutenberg or a simple plugin for the classic editor.
Why Use Multi-column Posts in WordPress?
Using multi-column writings in traditional media, such as newspapers and magazines, is very common due to its visual appeal. But on the Web, most posts use a single-column structure.
However, sometimes for highlighting some of the content and because it is easier to read multi-column entries, we find that some WordPress websites also use multi-threaded writings.
The purpose of creating multi-column content in the Web and WordPress is to create more attractive pages. This structure also allows users to read much more in a small space.
In this article, we’ll teach you how to publish your content in a multi-column text format, in both the Gutenberg WordPress editor and the old TinyMCE editor, without using complex HTML code.
How to Add Columns to WordPress Post and Page? (Gutenberg)
First of all, it’s not a difficult process to create multi-column in WordPress, as it’s a default feature on Gutenberg since its release. Thanks to the new WordPress editor, which is equipped with a specific block type for creating columns, you no longer need to write complex HTML and CSS codes, and can easily format your content in 2 to 6 columns.
To add multi-column templates and create multi-column posts in WordPress’s Gothenburg editor, just create a new post or edit one of the existing posts.
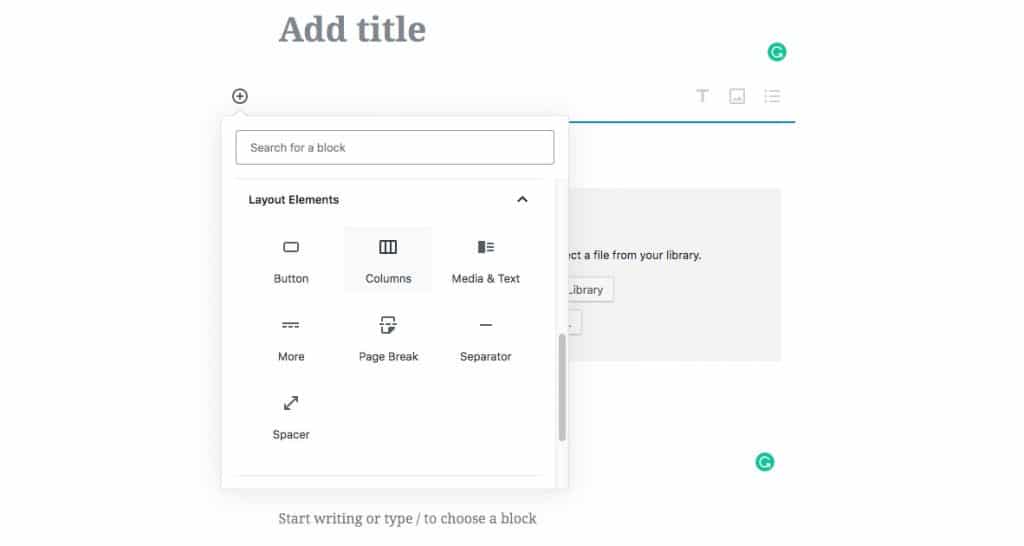
Then, in the edit space, click on add icon at the top of the page to add a new block. Then click on the Columns option under the Layout Elements tab. (You can type Columns word in the search bar and find it.) Should look like the picture below:

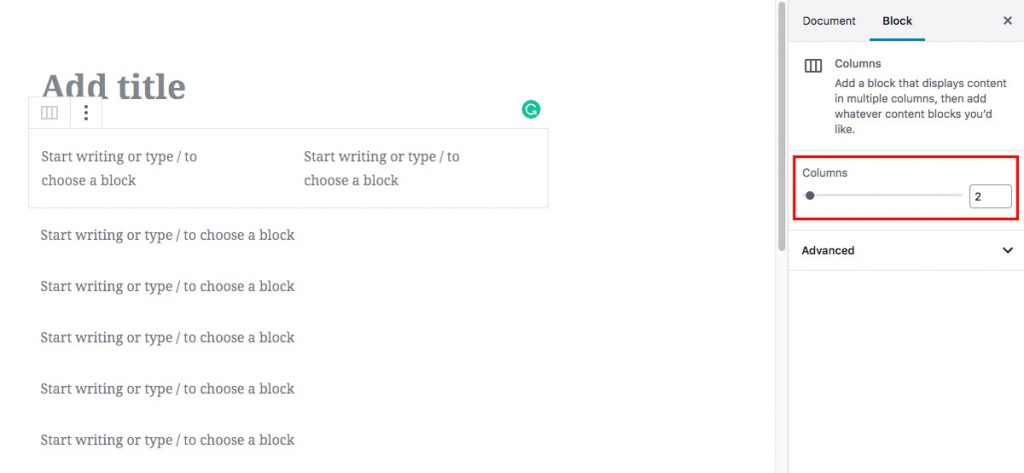
Now you have created two columns for your post. By default, Gothenburg offers 2 columns. You can increase this number to 6. To add the number of columns, select the number on the right side of the page, from the column number field as shown below:

Create Multi-column Posts in the WordPress Classic Editor
The old WordPress editor (TinyMCE) does not support columns as a default. However, by simply installing a plugin, you can easily create your own custom columns.
To do this, download and install the Advanced WP Columns plugin. After activating the plugin, go to the edit page of one of the previous posts or create a new post. Then you’ll see a new option appear in the toolbar called Advanced WP Columns. It would look something like this:


By clicking on the new option, a new window will open.
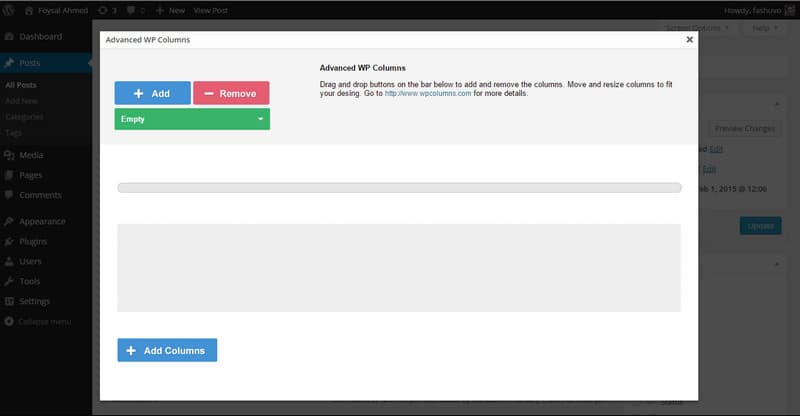

This window is equipped with some default templates to create multi-column entries that you can use. The Empty menu shows you options of two-column, three columns, and so on.
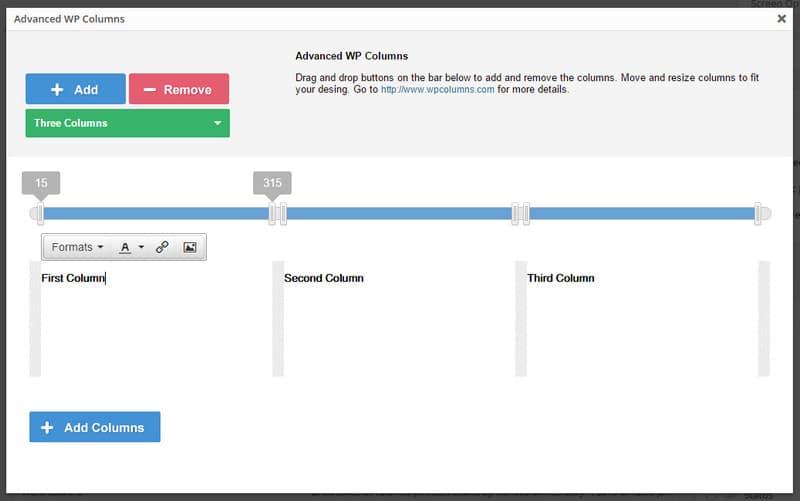

In the column sections, the width of all columns are the same. If you want, you can change the width of the columns by dragging and dropping them. You can also customize the font and color of the text for each column. After editing, click the Add Columns button to add the changes you made to the text.
To create custom columns (without using default features), you can select the + Add option from the first window and manually set up columns to your preference. You can also select and delete the column by clicking on the option to remove or add more columns.
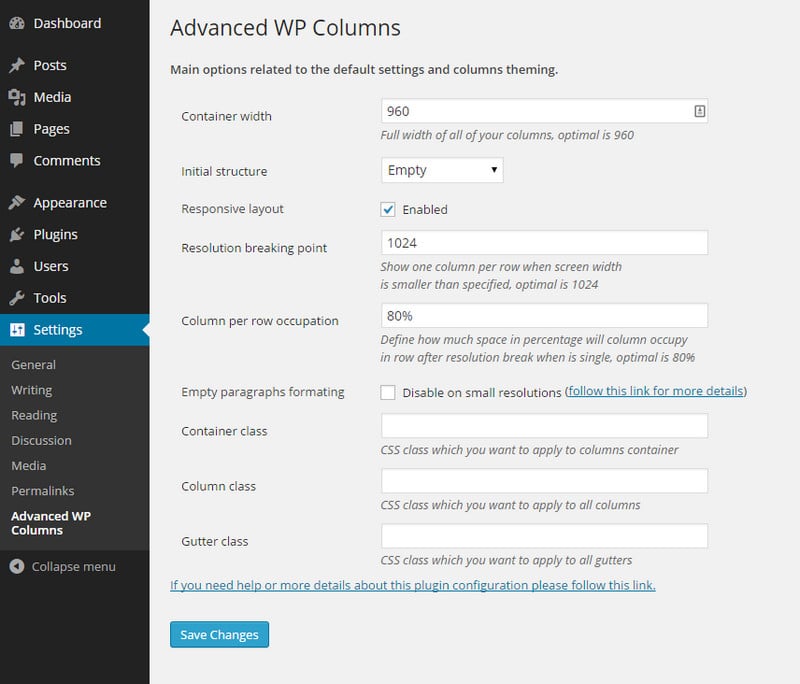
Of course, the plugin also has the option to adjust advanced and change default settings. By entering the Settings section and selecting Advanced WP Columns in the WordPad dashboard, you can adjust the column space on different displays and have access to more options as well.
