The only step you need to take is setting up the schedule and the rest is on WordPress. Posts will be published on a specified date.
One of the key features of WordPress is the ability to schedule posts. This means you can schedule your posts according to your plans and the post will get published if you are there or not.
But if you need to schedule a few posts, you need to open them one by one and schedule them; or you can use a plugin to bulk schedule posts in WordPress.
When do we need to bulk schedule posts in WordPress?
As we have explained before, regularly publishing posts on your website has a tremendous effect on your SEO. On the other hand, if you miss publishing a post it will surely have a negative effect on your SEO. Ultimately your website visitors may lose interest in your content as they can’t find routine posts to come back.
Scheduling a post in WordPress is an easy task. All you need to do is, prepare your post and once you are finished set the publishing date to sometime in the future and click on Schedule, which has replaced Publish.
But what if you want to publish a few posts, articles and content at the same time? Often you need to schedule a few posts in WordPress to get published at the exact same time. If you were to schedule each post one by one, it would take you a long time.
Keep in mind, by regularly updating your website and publishing posts, you will send a positive signal to Google and your users. One of being active and serious about your content. All of these have an amazing effect on your website’s SEO.
How to bulk schedule posts in WordPress?
As we mentioned above, bulk scheduling posts in WordPress is time-consuming. But how can you bulk schedule your posts quick and with minimum mistakes? The best way is to use the right plugin. Fortunately, there are many plugins designed to bulk schedule posts in WordPress and each of them has its unique features.
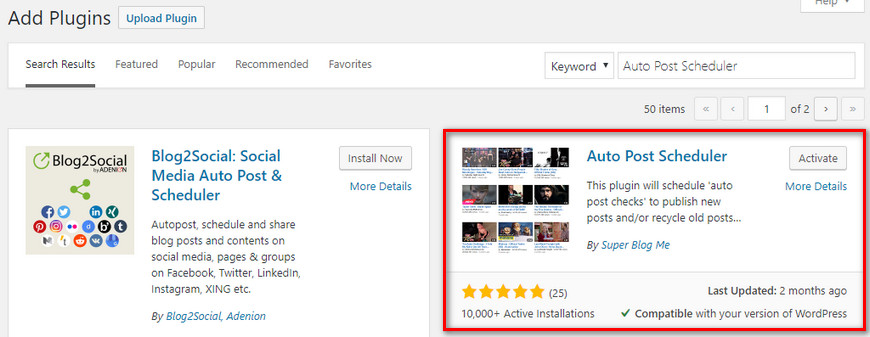

Auto Post Scheduler plugin is one of the best plugins in this field.
First, Head to Plugins in your WordPress dashboard and then add new. Search Auto Post Scheduler and install it. Once activated, head over to your WordPress dashboard > Settings > Auto Post Scheduler. Here you can configure the plugin to match your needs.
Once you open the plugin you’d notice that by default, the plugin is disabled. To enable it simply click on “Enable Auto Post Scheduler”.
When it’s enabled, it will begin to work with the default configuration. Therefore, we recommend you to configure it before enabling the plugin.
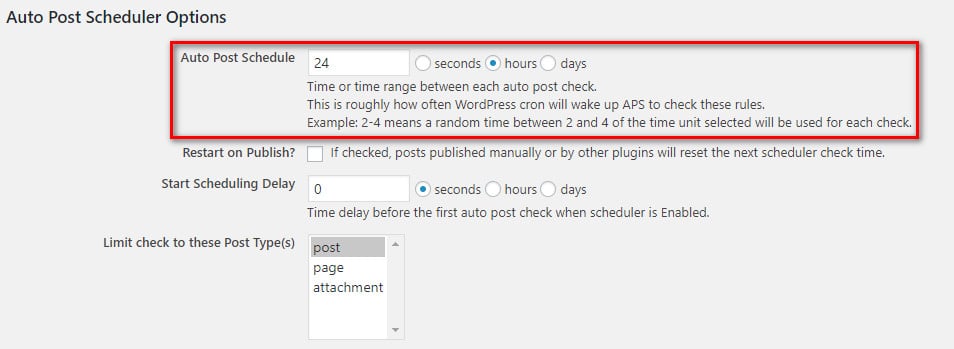
By default, this plugin publishes a post every 24 hours. You can change this number by setting Auto Post Schedule to your desired number.

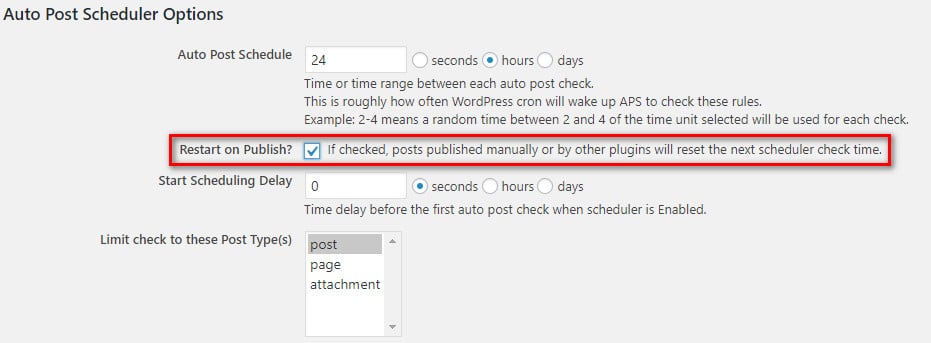
The next option is “Restart on Publish”. By enabling this option, your old posts are set to be published according to the new schedule. If you don’t want this option, leave it disabled.

The next option is “Start Scheduling Delay” which you can change its value. By default, it is set to 0 seconds. Which means, immediately after enabling it your first post will be published. In fact, this option is the time it takes to publish a post after enabling the plugin.
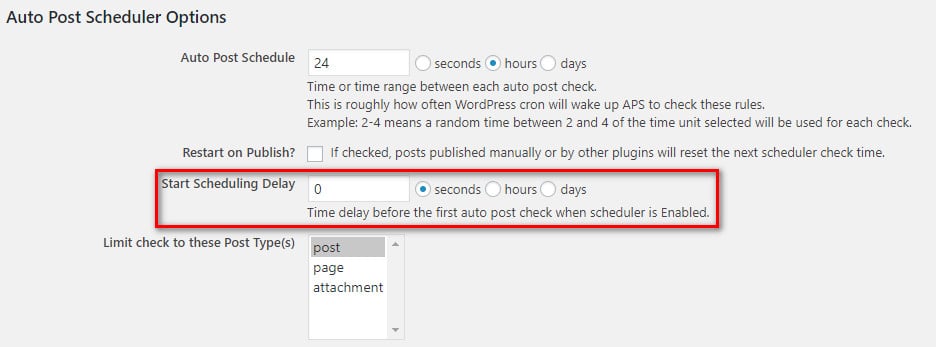

“Limit check to these post type(s)” is another feature of this plugin. Which means you can limit scheduling to posts, pages and etc. You can even select multiple post types. To do so, click on “Shift” on your keyboard when selecting a post type.
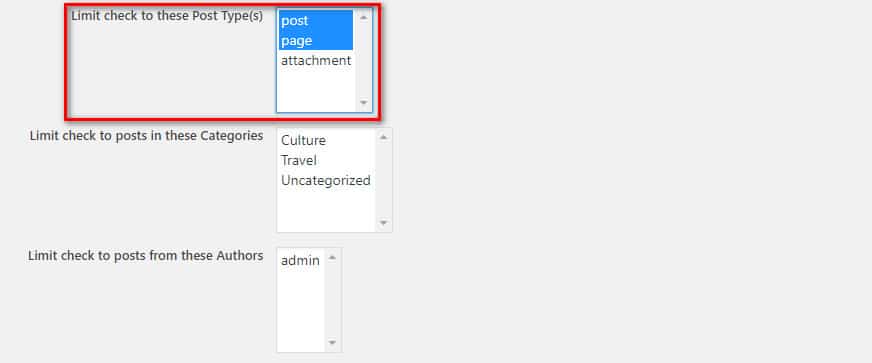

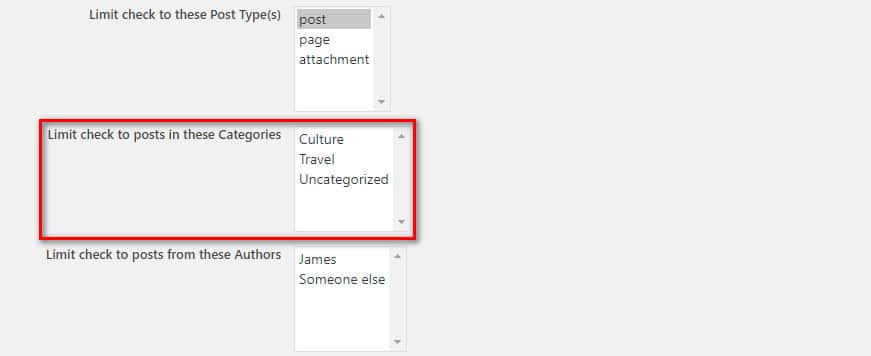
Also, you can limit the scheduling to certain categories. If you want every category to be included, leave this untouched.

This limitation is not only for your posts and their categories. If you wish to publish posts belonging to spicific authors, you can easily add them to the scheduling. To do so, head over to “Limit check to posts from these authors” and select your authors.
Another featured designed in this plugin is being keyword sensitive. To enable this option, click on “limit check to posts with the keyword search”. Your posts with specified keywords will be added to the scheduling list and the rest will be spared.
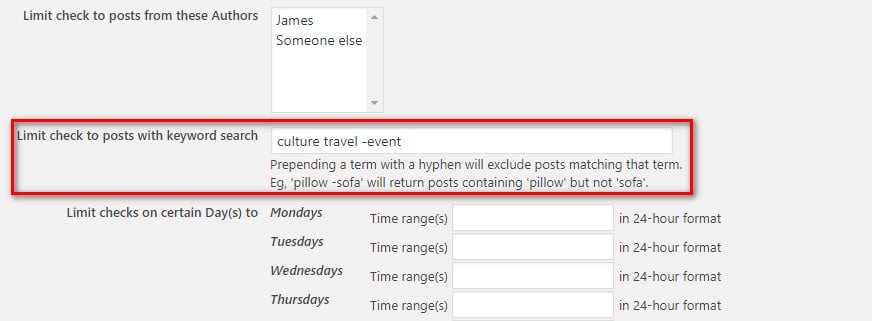

The next option is “limit checks on certain day(s) to”. By using this feature you can specify what time every week the posts can be published. You don’t necessarily have to select the same time/date for each day. You can use a different time for each day. Just keep in mind, these hours and dates should be specified in 24 hours format.


Another feature offered by Auto Post Scheduler is the ability to specify different timing for each day. You can also specify which posts (pending, draft and etc.) gets added to the list. To do so, click on “eligible post statuses”. By default, this option is configured to draft.
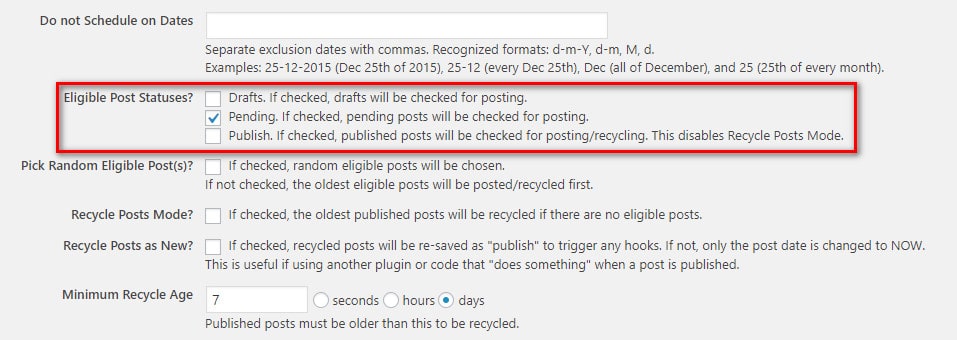

Make sure you click on “Update options” to save your changes.


As mentioned above, it’s best to personalize these settings before enabling the plugin. To enable the plugin you need to click on “Enable Auto Post Scheduler”.


Conclusion
By configuring the options above and enabling the plugin you can easily bulk schedule posts in WordPress. Scheduling post(s) ads a sense of professionalism to your website.
You must always review the process of publishing a post to reduce or eliminate the risk of publishing a wrong post or the missed schedule error in WordPress posts.


